
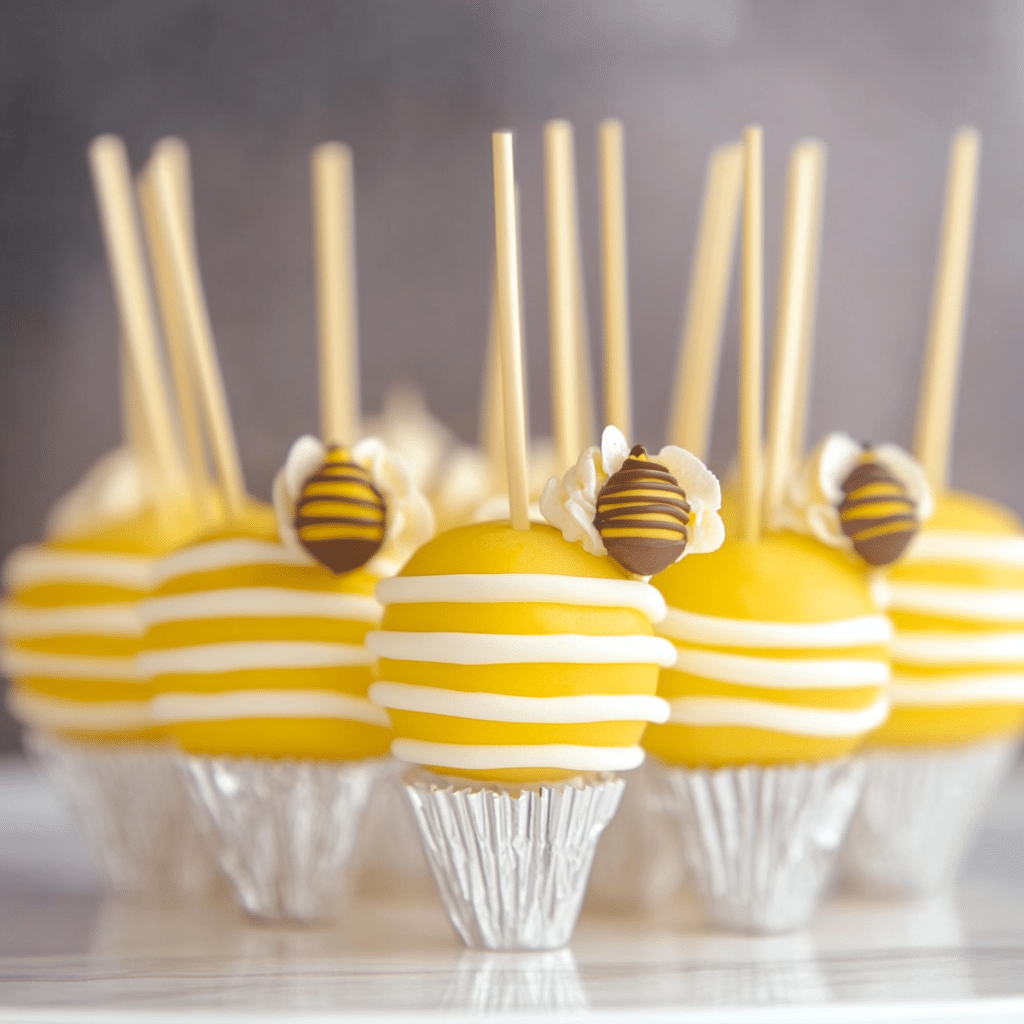
Bee Cake Pops are an adorable and fun treat that’s perfect for parties, celebrations, or just because. These delightful bites combine moist cake with creamy frosting, shaped into charming bee designs. They are as delicious as they are delightful to look at, making them a hit with both kids and adults alike.
Why You’ll Love This Recipe
- Fun and Creative: These cake pops are a fantastic way to get creative in the kitchen.
- Perfect for Parties: Their cute bee design makes them an excellent choice for themed parties or gatherings.
- Customizable: You can switch up flavors and decorations to suit your preferences.
- Kid-Friendly: Both making and eating these cake pops is a hit with children.
Ingredients
(Tip: You’ll find the full list of ingredients and measurements in the recipe card below.)
- Vanilla or chocolate cake (baked and crumbled)
- Frosting (cream cheese or buttercream works best)
- Yellow candy melts
- Black candy melts or black edible decorating gel
- White candy melts or candy eyes
- Lollipop sticks
- Optional: Sprinkles or additional decorations
Directions

- Prepare the Cake Mixture: Crumble the cake into fine crumbs in a large bowl. Add frosting a spoonful at a time, mixing until the texture resembles moldable dough.
- Shape the Cake Pops: Roll the mixture into small balls and slightly elongate them to resemble a bee’s body. Place on a lined baking sheet and refrigerate for 30 minutes.
- Melt the Candy: In separate bowls, melt yellow, black, and white candy melts according to package instructions.
- Insert Sticks: Dip lollipop sticks into the melted yellow candy and insert them halfway into the cake balls. Let the candy set.
- Coat with Yellow Candy: Dip each cake ball into the yellow candy melts, ensuring it is fully coated. Let any excess drip off.
- Add Black Stripes: Use melted black candy or decorating gel to add stripes around the bee’s body.
- Create Eyes and Wings: Attach candy eyes using a dab of melted yellow candy. Use white candy melts to create wings or attach candy decorations.
- Let Set: Place the decorated cake pops upright in a foam block or stand until the candy coating hardens completely.
- Serve and Enjoy: Serve your bee cake pops at room temperature.
Servings and Timing
- Servings: 12-15 cake pops (depending on size)
- Prep Time: 45 minutes
- Chilling Time: 30 minutes
- Total Time: 1 hour 15 minutes
Variations
- Flavor Swaps: Use red velvet, lemon, or funfetti cake for a different flavor profile.
- Colors and Designs: Experiment with different colors and shapes for various themes, like ladybugs or butterflies.
- Frosting Options: Try chocolate ganache, Nutella, or flavored frosting for unique tastes.
- Gluten-Free: Use gluten-free cake and frosting to make this recipe gluten-free.
Storage/Reheating
- Storage: Store cake pops in an airtight container at room temperature for up to 2 days. For longer storage, refrigerate for up to 1 week.
- Freezing: Freeze undecorated cake balls for up to 3 months. Thaw, decorate, and serve.
- Reheating: These treats don’t require reheating, but let chilled cake pops sit at room temperature for 10-15 minutes before serving for the best texture.
FAQs
How far in advance can I make bee cake pops?
You can prepare and decorate them up to 3 days in advance and store them in an airtight container.
What type of frosting works best for cake pops?
Cream cheese or buttercream frosting works best as they help bind the cake crumbs together.
Can I make these without lollipop sticks?
Yes, you can make cake balls instead of pops by omitting the sticks.
How do I prevent cake pops from falling off the stick?
Ensure the stick is coated with melted candy before inserting it into the cake ball and chill them before dipping.
What can I use instead of candy melts?
White chocolate with food coloring can be used as a substitute for candy melts.
How do I create perfectly smooth cake pops?
Tap off excess candy melts gently and rotate the cake pop for a smooth finish.
Can I use store-bought cake?
Absolutely! Store-bought cake works perfectly for this recipe.
Why is my candy coating cracking?
Cracking often occurs due to temperature differences between the coating and cake pops. Allow the pops to reach room temperature before dipping.
Can I make this recipe vegan?
Yes! Use vegan cake, frosting, and dairy-free chocolate or candy melts.
How can I display bee cake pops?
Use a foam block, cake pop stand, or decorative vase filled with beans or candy to hold them upright.
Conclusion
Bee Cake Pops are a delightful treat that brings sweetness and creativity together. Their charming design and delicious flavor make them a must-try recipe for your next celebration or gathering. With simple steps and plenty of room for customization, these cake pops are sure to bring a buzz to your kitchen. Happy baking!
Print
Bee Cake Pops
- Prep Time: 1 hour
- Cook Time: 30 minutes
- Total Time: 2 hours 10 minutes
- Yield: 20–24 cake pops 1x
- Category: Dessert
- Method: No-bake (after baking cake)
- Cuisine: American
- Diet: Vegetarian
Description
Adorable and delicious, these bee cake pops are perfect for parties, baby showers, or as a fun treat. Made with moist cake, creamy frosting, and covered in candy melts, they’re shaped and decorated to look like cheerful bees.
Ingredients
For the Cake:
- 1 box of yellow cake mix (plus ingredients listed on the package)
- 1/3 cup unsalted butter, softened
- 1/3 cup frosting (vanilla or cream cheese frosting)
For Decoration:
- Yellow candy melts
- Black candy melts
- White chocolate or white candy melts (for wings)
- Edible black food marker or black icing for details
- Lollipop sticks
Instructions
- Bake the Cake:
- Prepare the yellow cake according to the package instructions. Let it cool completely.
- Crumble and Mix:
- Crumble the cooled cake into fine crumbs in a large bowl.
- Add the softened butter and frosting, mixing until the texture resembles dough.
- Shape the Pops:
- Roll small portions of the mixture into oval-shaped balls to resemble bees.
- Place on a baking sheet lined with parchment paper. Chill for 30 minutes in the fridge.
- Insert the Sticks:
- Melt a small amount of yellow candy melts. Dip one end of a lollipop stick into the candy melt, then insert it into a bee-shaped ball. Repeat for all pops. Chill for another 10 minutes.
- Coat the Pops:
- Melt the yellow candy melts in a microwave-safe bowl, stirring every 30 seconds until smooth.
- Dip each pop into the yellow candy melt, tapping off excess. Stand them upright to set (use a foam block or cake pop stand).
- Decorate:
- Melt the black candy melts and transfer them to a piping bag (or use a toothpick). Add stripes and a face to each bee.
- For wings, melt white candy melts and pipe small wing shapes on wax paper. Once set, attach to the cake pops with melted candy.
- Finishing Touches:
- Use an edible black marker or icing to add finer details if needed.
Notes
- For best results, work in batches to keep the cake balls chilled during decorating.
- Experiment with adding edible glitter or sprinkles for extra flair!
Your email address will not be published. Required fields are marked *