

Chocolate Protein Bliss Balls are the ultimate healthy snack that combines a rich chocolatey flavor with a protein-packed punch. Perfect for meal prep, these no-bake treats are quick, easy, and incredibly satisfying—ideal for busy days or post-workout energy boosts.
Why You’ll Love This Recipe
- Quick and Easy: Ready in under 20 minutes with no baking required.
- Healthy and Satisfying: Packed with protein, healthy fats, and natural sweetness.
- Customizable: Adjust ingredients to suit your taste or dietary preferences.
- Portable: Great for on-the-go snacking or lunchbox treats.
- Kid-Friendly: A healthier alternative to store-bought snacks that kids will love.
Ingredients
(Tip: You’ll find the full list of ingredients and measurements in the recipe card below.)
- Chocolate protein powder
- Rolled oats
- Nut butter (e.g., almond or peanut butter)
- Unsweetened cocoa powder
- Honey or maple syrup
- Dark chocolate chips
- Vanilla extract
- Optional: chia seeds, flaxseeds, or shredded coconut for added texture and nutrition
Directions

- Mix the Dry Ingredients: In a large bowl, combine the chocolate protein powder, rolled oats, cocoa powder, and any optional dry add-ins like chia seeds or flaxseeds.
- Incorporate the Wet Ingredients: Add the nut butter, honey or maple syrup, and vanilla extract to the bowl. Mix until the mixture forms a sticky dough.
- Add Chocolate Chips: Fold in the dark chocolate chips for bursts of chocolate in every bite.
- Shape the Balls: Scoop out small portions of the dough and roll them into bite-sized balls using your hands.
- Chill and Set: Place the balls on a parchment-lined tray and refrigerate for at least 15 minutes to firm up.
- Serve and Enjoy: Once set, enjoy immediately or store for later.
Servings and Timing
- Servings: Makes approximately 12-15 bliss balls, depending on size.
- Prep Time: 15 minutes
- Chill Time: 15 minutes
Variations
- Nut-Free Option: Replace nut butter with sunflower seed butter or tahini.
- Low-Carb/Keto: Use a low-carb sweetener like stevia or erythritol instead of honey or maple syrup.
- Extra Protein Boost: Add a tablespoon of collagen powder or an extra scoop of protein powder.
- Flavor Twists: Add a pinch of sea salt, a dash of cinnamon, or a drop of peppermint extract for unique flavors.
- Coated Bliss Balls: Roll the finished balls in shredded coconut, crushed nuts, or cocoa powder for a decorative and tasty finish.
Storage/Reheating
- Storage: Store the bliss balls in an airtight container in the refrigerator for up to one week.
- Freezing: For longer storage, freeze the balls in a single layer on a tray before transferring them to a freezer-safe container. They can be frozen for up to 3 months.
- Serving: Thaw frozen bliss balls in the refrigerator or at room temperature before eating.
FAQs
1. Can I use a different type of protein powder?
Yes, you can use whey, plant-based, or collagen protein powder. Just make sure the flavor complements the recipe.
2. Can I make these vegan?
Absolutely! Use a plant-based protein powder and swap honey for maple syrup or agave nectar.
3. Are these bliss balls gluten-free?
Yes, if you use certified gluten-free oats and check that your protein powder is gluten-free.
4. How long do these bliss balls last?
They last up to 7 days in the fridge and up to 3 months in the freezer.
5. Can I skip the cocoa powder?
Skipping the cocoa powder will reduce the chocolate flavor, but you can add extra protein powder or oats as a substitute.
6. What can I use instead of nut butter?
Try seed butter, tahini, or even plain Greek yogurt for a different texture.
7. Can I add dried fruit?
Yes, chopped dried fruits like cranberries or raisins add sweetness and texture.
8. Are these suitable for kids?
Yes, they are a nutritious and delicious snack for kids. Adjust sweetness to taste if needed.
9. What if the dough is too dry?
Add a teaspoon of water, milk, or extra nut butter to reach the desired consistency.
10. Can I double the recipe?
Yes, this recipe is easy to scale up for meal prep or larger gatherings.
Conclusion
Chocolate Protein Bliss Balls are the perfect snack for anyone seeking a healthy, delicious, and convenient treat. With their simple preparation, customizable ingredients, and nourishing benefits, they are a staple recipe you’ll turn to time and time again. Whip up a batch today and enjoy a guilt-free snack that’s as wholesome as it is satisfying!
Print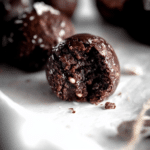
Chocolate Protein Bliss Balls
- Prep Time: 10 minutes
- Total Time: 10 minutes (plus 30 minutes chilling time)
- Yield: Approximately 12 bliss balls 1x
- Category: Snack
- Method: No-Bake
- Cuisine: American
- Diet: Vegetarian
Description
These Chocolate Protein Bliss Balls are a healthy and satisfying snack, packed with protein and rich chocolate flavor. They’re simple to prepare and perfect for on-the-go energy.
Ingredients
- 1 cup rolled oats
- 1/2 cup chocolate protein powder
- 1/4 cup almond butter
- 1/4 cup honey or maple syrup
- 1/4 cup chopped almonds
- 1/4 cup shredded coconut
- 1/4 cup dark chocolate chips
- 1 teaspoon vanilla extract
Instructions
- In a food processor, combine the rolled oats, chocolate protein powder, almond butter, honey (or maple syrup), chopped almonds, shredded coconut, dark chocolate chips, and vanilla extract.
- Pulse until the mixture sticks together and reaches a dough-like consistency.
- Roll the mixture into small balls, about 1 inch in diameter, and place them on a baking sheet lined with parchment paper.
- Chill the bliss balls in the refrigerator for about 30 minutes before serving to allow them to firm up.
Notes
- For a vegan option, use maple syrup instead of honey.
- Store the bliss balls in an airtight container in the refrigerator for up to one week.
- These bliss balls can also be frozen for up to three months; thaw in the refrigerator before consuming.
Your email address will not be published. Required fields are marked *