

Cotton Candy Fudge is a delightful and colorful treat that perfectly combines the creamy texture of fudge with the nostalgic flavor of cotton candy. Its vibrant hues and sweet taste make it a fun dessert for parties, holidays, or anytime you’re craving something whimsical.
Why You’ll Love This Recipe
- Unique Flavor: Brings the magic of cotton candy into a rich, melt-in-your-mouth fudge.
- Easy to Make: Requires simple ingredients and minimal effort.
- Crowd Pleaser: Perfect for kids’ parties, baby showers, or as a sweet gift.
- Customizable: You can play with colors and decorations to suit any occasion.
Ingredients
(Tip: You’ll find the full list of ingredients and measurements in the recipe card below.)
- White chocolate chips
- Sweetened condensed milk
- Cotton candy flavoring
- Pink and blue food coloring
- Optional: sprinkles for decoration
Directions

- Line an 8×8-inch baking dish with parchment paper, leaving a slight overhang for easy removal.
- In a microwave-safe bowl, combine white chocolate chips and sweetened condensed milk. Heat in 20-30 second intervals, stirring after each, until the mixture is fully melted and smooth.
- Divide the mixture into two bowls. Add cotton candy flavoring to each and mix well.
- In one bowl, add a few drops of pink food coloring and mix until evenly combined. In the other bowl, add blue food coloring and mix.
- Pour the pink mixture into the prepared dish, spreading it evenly. Follow with the blue mixture, layering it over the pink. Use a toothpick to create swirls for a marbled effect if desired.
- Add sprinkles on top, gently pressing them into the fudge.
- Refrigerate for 2-3 hours, or until set.
- Once firm, lift the fudge out using the parchment overhang. Cut into squares and serve.
Servings and Timing
- Servings: Approximately 16 squares (depending on the size of cuts)
- Prep Time: 10 minutes
- Chill Time: 2-3 hours
Variations
- Colorful Layers: Add more colors to the fudge to make it even more vibrant.
- Flavor Twists: Experiment with other flavorings like bubblegum or strawberry.
- Vegan Option: Use dairy-free white chocolate chips and condensed milk substitutes.
- Decorations: Add edible glitter or themed sprinkles for a festive touch.
Storage/Reheating
- Storage: Store the fudge in an airtight container in the refrigerator for up to 1 week.
- Freezing: Freeze for up to 2 months in a freezer-safe container. Thaw in the refrigerator before serving.
- Reheating: Not applicable, as fudge is best served chilled.
FAQs
1. Can I make this fudge without food coloring?
Yes, you can skip the food coloring for a more natural appearance, but the vibrant colors add to the cotton candy vibe.
2. Where can I find cotton candy flavoring?
Cotton candy flavoring is often available online or in specialty baking stores.
3. Can I use regular chocolate chips instead of white chocolate?
White chocolate is best for this recipe to achieve the cotton candy flavor and color. Regular chocolate would alter the taste and appearance.
4. How do I prevent the layers from mixing?
Allow the bottom layer to cool slightly before adding the next layer to prevent blending.
5. Can I make this fudge without a microwave?
Yes, you can melt the ingredients on the stovetop using a double boiler.
6. Is cotton candy fudge gluten-free?
Yes, this recipe is naturally gluten-free, but check all ingredients for potential cross-contamination.
7. Can I double the recipe?
Absolutely! Use a larger baking dish and double all ingredients for a bigger batch.
8. Why isn’t my fudge setting?
Ensure you’ve measured the ingredients correctly and allowed enough time for chilling.
9. Can I add mix-ins like nuts or dried fruit?
While it’s unconventional for cotton candy fudge, you can add mix-ins for texture.
10. How long can I leave the fudge at room temperature?
The fudge can stay at room temperature for a few hours, but it’s best kept chilled for optimal texture.
Conclusion
Cotton Candy Fudge is a fun, easy-to-make dessert that’s sure to bring smiles to anyone who tries it. Whether you’re making it for a party or just treating yourself, its delightful flavors and whimsical appearance make it a standout choice. Give it a try, and enjoy the sweet magic of cotton candy in every bite!
Print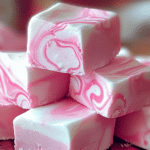
Cotton Candy Fudge
- Prep Time: 10 minutes
- Cook Time: 10 minutes
- Total Time: 2 hours 20 minutes
- Yield: 16 squares 1x
- Category: Dessert
- Method: Stovetop
- Cuisine: American
- Diet: Vegetarian
Description
This easy-to-make recipe features swirls of pink and blue, making it as visually appealing as it is tasty.
Ingredients
- 3 cups white chocolate chips
- 1 (14 oz) can sweetened condensed milk
- 2 tablespoons unsalted butter
- 2 teaspoons cotton candy flavoring
- Pink and blue gel food coloring
- Optional: unicorn or rainbow sprinkles for decoration
Instructions
- Prepare the Pan:
- Line an 8×8-inch baking dish with parchment paper, leaving some overhang on the sides for easy removal.
- Melt the Ingredients:
- In a medium saucepan over low heat, combine the white chocolate chips, sweetened condensed milk, and butter.
- Stir continuously until the mixture is fully melted and smooth.
- Remove from heat and stir in the cotton candy flavoring.
- Divide and Color the Mixture:
- Separate the melted mixture evenly into two bowls.
- Add a few drops of pink gel food coloring to one bowl and blue gel food coloring to the other.
- Stir each until the colors are well incorporated.
- Create the Swirl Effect:
- Spoon dollops of the pink and blue mixtures alternately into the prepared baking dish.
- Use a toothpick or butter knife to gently swirl the colors together, creating a marbled effect. Avoid over-mixing to keep the swirls distinct.
- Add Sprinkles (Optional):
- Sprinkle unicorn or rainbow sprinkles on top for added decoration.
- Set the Fudge:
- Refrigerate the pan for at least 2 hours, or until the fudge is firm.
- Once set, lift the fudge out using the parchment paper overhang and place it on a cutting board.
- Slice and Serve:
- Cut the fudge into 1-2 inch squares.
- Serve and enjoy this whimsical treat!
Notes
- For best results, use gel food coloring to achieve vibrant colors without altering the consistency of the fudge.
- Store the fudge in an airtight container in the refrigerator for up to two weeks.
- This recipe is versatile and can be customized with different colors and flavorings to suit various occasions.
Your email address will not be published. Required fields are marked *