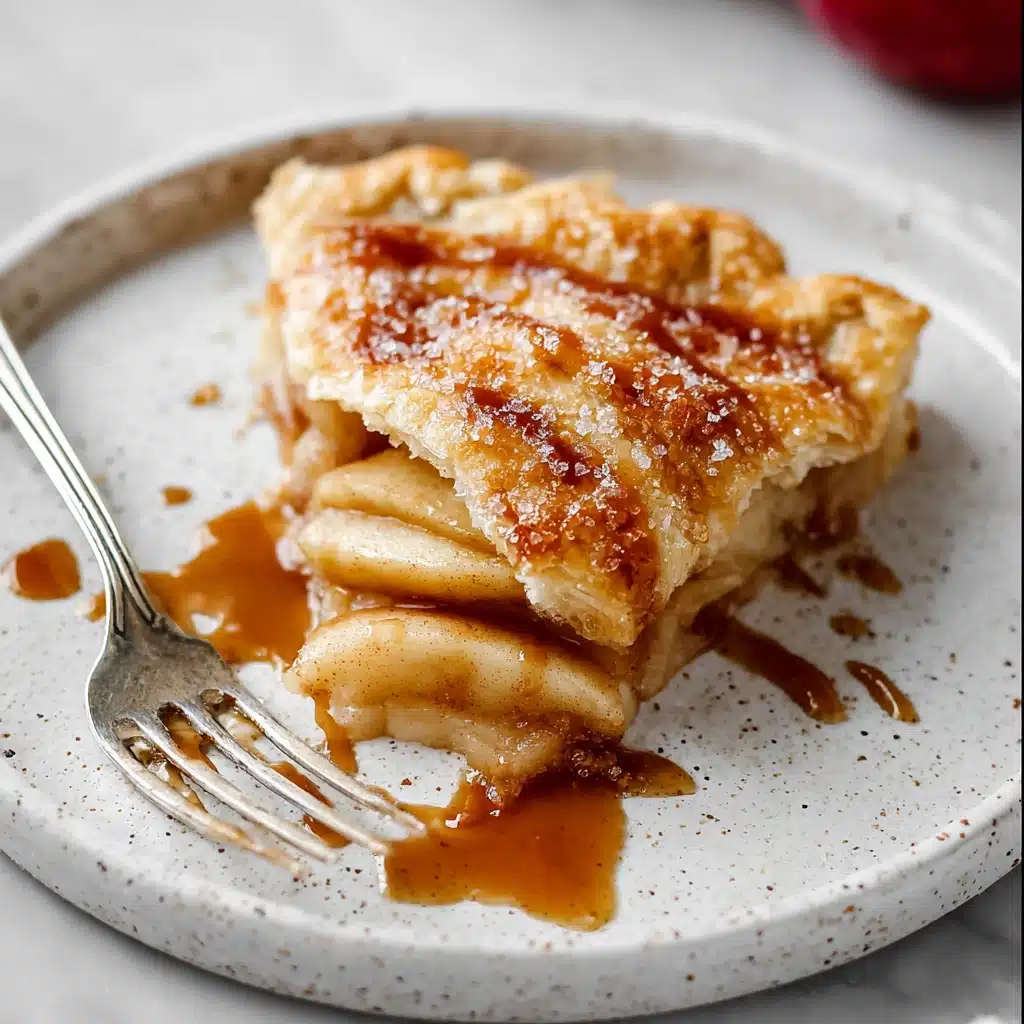
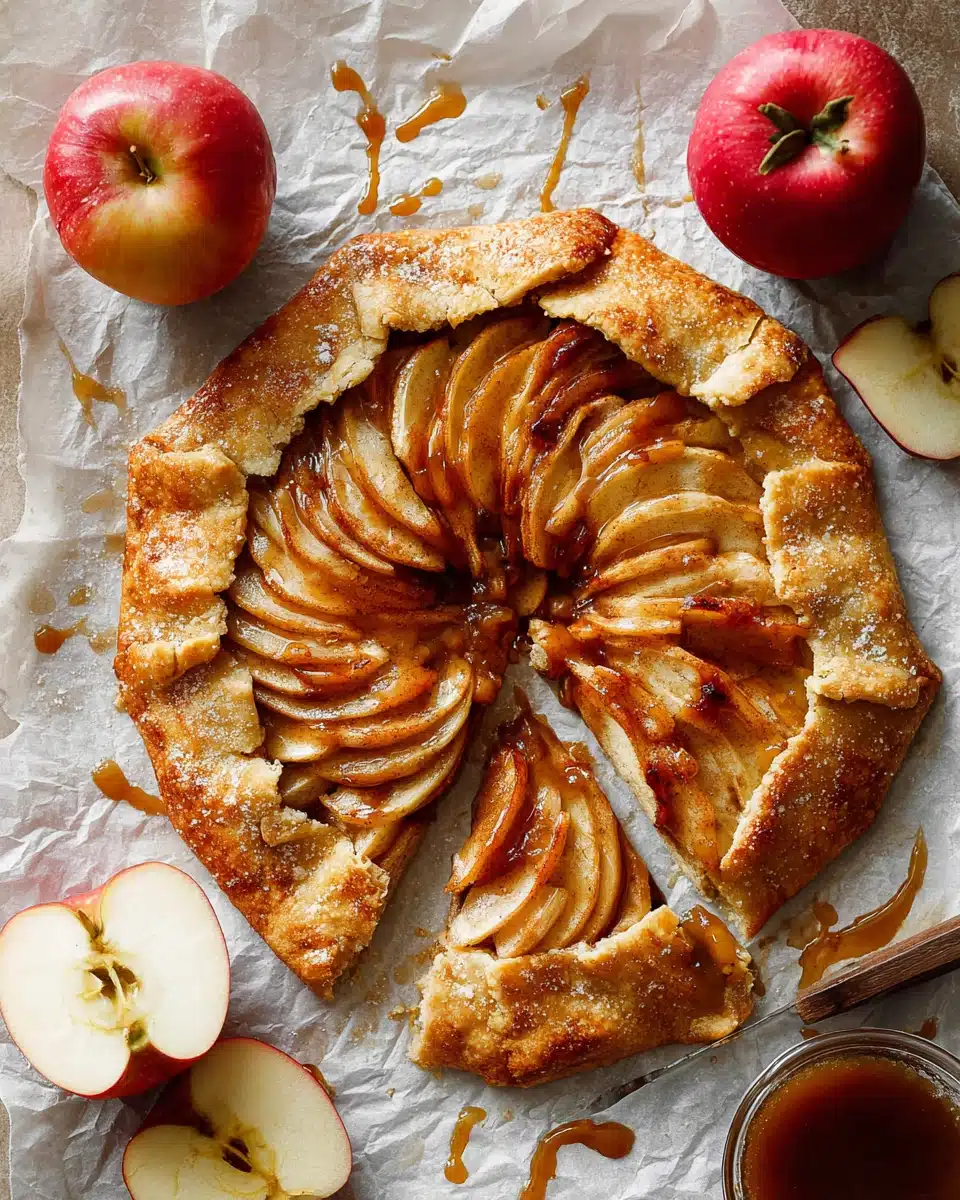
This Easy Apple Galette Recipe is a true celebration of everything we love about fall baking, yet it’s approachable enough to whip up any time of year. Imagine buttery, flaky pastry hugging layers of delicately spiced apples, all baked to golden perfection with crisp, caramelized edges. You don’t need fancy equipment or bakery skills to create this rustic beauty—the magic happens in its simplicity. Whether you’re a seasoned baker or a dessert novice, this galette is a surefire way to impress yourself and anyone lucky enough to grab a slice.
Ingredients You’ll Need
One of the best things about the Easy Apple Galette Recipe is how fewer, well-chosen ingredients come together to create pure apple bliss. Each ingredient plays a unique part, balancing flavors and textures while letting the apples shine.
- Fresh Apples: Choose firm, tart-sweet varieties like Granny Smith or Honeycrisp for a balanced filling and tender bite.
- Premade or Homemade Pie Dough: A buttery, flaky crust is the backbone of this galette; feel free to use your favorite store-bought or a reliable homemade recipe.
- Granulated Sugar: Sweetens the apples and helps them caramelize beautifully in the oven.
- Ground Cinnamon: Adds a cozy, unmistakable warmth that pairs so naturally with apples.
- Lemon Juice: A splash brightens up the filling and keeps your apples from browning.
- Unsalted Butter: Dotted over the apples, it melts into gooey pockets that promote browning and extra flavor.
- Egg (for egg wash): Brushing the crust gives it that irresistible, shiny golden finish.
- Coarse Sugar (for sprinkling): Adds a delightful crunch and subtle sparkle on the crust.
How to Make Easy Apple Galette Recipe
Step 1: Prepare the Dough
If you’re using homemade dough, start by rolling it into a 12-inch circle on a lightly floured surface. If you’re going the store-bought route, just let it come to room temperature so it’s easy to handle. Either way, transfer your dough onto a parchment-lined baking sheet so you’re ready for filling and folding without any sticky situations.
Step 2: Slice and Season the Apples
Peel and core your apples, then slice them thinly, about 1/8 inch thick. Toss the slices with granulated sugar, cinnamon, and a little lemon juice. Let the apples sit for a few minutes—this draws out some of their juices and enhances their natural flavor, making sure every bite of the Easy Apple Galette Recipe is sweet and satisfying.
Step 3: Layer the Apples on the Dough
Leaving a 2-inch border around the edge, fan out the apple slices in circles or free-form layers on your dough. Overlapping them slightly gives the galette a lovely rustic look and ensures an even distribution of fruit. This is your moment to get a little artistic, but there’s truly no wrong way to pile on the apples.
Step 4: Fold and Finish the Crust
Carefully lift the edge of the dough and fold it up over the apples, pleating as you go for that signature galette shape. Dot the apples with cold bits of butter, then brush the crust generously with an egg wash. Sprinkle coarse sugar over the top for an extra crunch and eye-catching golden sparkle.
Step 5: Bake to Perfection
Slide the galette into a preheated 400°F (200°C) oven and bake for about 35-40 minutes, or until the crust is deeply golden and the apples are soft, bubbling, and caramelized around the edges. The aroma will signal it’s ready even before you open the oven door. Let it cool for at least 15 minutes before slicing—the hardest step by far!
How to Serve Easy Apple Galette Recipe

Garnishes
For a finishing flourish, sprinkle the warm galette with powdered sugar or drizzle with a touch of homemade caramel sauce, if you’re feeling indulgent. A scoop of vanilla ice cream or a dollop of freshly whipped cream alongside each slice turns this humble dessert into a real showstopper.
Side Dishes
This Easy Apple Galette Recipe loves company! Serve it with a bowl of fresh berries, a crisp green salad for a brunch spread, or follow it with strong coffee or mulled cider—it’s so adaptable to every setting, from casual weeknight treats to festive gatherings.
Creative Ways to Present
Galettes are as much about personality as flavor, so get creative! Try baking smaller, individual galettes for a personalized touch, or serve wedges atop a wooden board for a rustic dessert buffet. You can even top with toasted nuts, orange zest, or a sprinkle of sea salt to switch up the vibe.
Make Ahead and Storage
Storing Leftovers
Have leftovers? Lucky you! Wrap cooled slices tightly in plastic wrap or store in an airtight container. The galette will keep at room temperature for one day or up to three days in the refrigerator—perfect for a next-day sweet snack.
Freezing
Want to save your Easy Apple Galette Recipe for later? Simply wrap the whole baked (and cooled) galette tightly and freeze for up to two months. When you’re ready to enjoy, thaw overnight in the refrigerator for best texture.
Reheating
To restore that lovely flaky crust, reheat individual slices in a toaster oven or regular oven at 350°F (175°C) for about 10 minutes. The edges will crisp right up and the apples will taste like you just pulled it out fresh.
FAQs
Can I use other fruits in an Easy Apple Galette Recipe?
Absolutely! This recipe is wonderfully versatile. Try swapping apples for pears, peaches, plums, or a mix of berries—just adjust the sugar if your substitute fruit is extra tart or sweet.
Do I have to peel the apples?
Peeled apples offer a softer, more classic texture, but if you enjoy a little extra bite and color, feel free to leave the skins on. It’s all about personal preference and rustic charm!
Can I make the galette ahead of time?
Yes—you can assemble the entire galette, cover, and store in the refrigerator for up to 6 hours before baking. When ready, just pop it straight into the oven and enjoy the fresh-baked aroma.
What kind of apples work best?
Tart-sweet, firm varieties such as Granny Smith, Honeycrisp, or Braeburn are ideal for this Easy Apple Galette Recipe, as they hold their shape and deliver balanced flavor.
How do I keep my galette crust from being soggy?
Start with a well-chilled dough, slice your apples thinly, and avoid piling on too much filling or liquid. Brushing the bottom of the crust with a little egg white or sprinkling with ground nuts before adding fruit can also help keep things crisp.
Final Thoughts
Everything about this Easy Apple Galette Recipe begs you to roll up your sleeves and get baking—even if you’ve never made a galette before. It’s simple, unfussy, and endlessly rewarding, both in flavor and the cozy memories you’ll create around the table. Don’t wait for a special occasion—give it a try and make any day just a little bit sweeter.
Print
Easy Apple Galette Recipe
- Prep Time: 20 minutes
- Cook Time: 40 minutes
- Total Time: 1 hour
- Yield: 6 servings 1x
- Category: Desserts
- Method: Baking
- Cuisine: French
- Diet: Vegetarian
Description
This easy apple galette offers the classic flavors of apple pie in a rustic, free-form tart that’s quick and simple to prepare. Tender, cinnamon-spiced apples are piled onto a buttery pastry crust and baked until golden, making this dessert perfect for both weeknights and special occasions.
Ingredients
For the Crust
- 1 1/4 cups (155g) all-purpose flour
- 1/2 teaspoon salt
- 1 tablespoon granulated sugar
- 8 tablespoons (1 stick) unsalted butter, cold and cut into cubes
- 3–4 tablespoons ice water
For the Filling
- 3 medium apples, peeled, cored, and thinly sliced
- 2 tablespoons granulated sugar
- 1 tablespoon brown sugar
- 1 tablespoon all-purpose flour
- 1 teaspoon ground cinnamon
- 1/4 teaspoon ground nutmeg
- 1 tablespoon lemon juice
For Assembly
- 1 egg, lightly beaten (for egg wash)
- 1 tablespoon coarse sugar (optional, for sprinkling)
Instructions
- Make the Crust: In a large bowl, combine flour, salt, and sugar. Add the cold butter cubes and cut them in using a pastry blender or your fingers until the mixture resembles coarse crumbs. Gradually add ice water, 1 tablespoon at a time, mixing until the dough just comes together. Shape into a disk, wrap in plastic, and refrigerate for at least 30 minutes.
- Prepare the Filling: In a medium bowl, toss the sliced apples with granulated sugar, brown sugar, flour, cinnamon, nutmeg, and lemon juice. Stir well to coat the apples evenly. Set aside while you roll out the dough.
- Roll out the Dough: On a lightly floured surface, roll the chilled dough into a 12-inch circle, about 1/8-inch thick. Transfer it carefully to a parchment-lined baking sheet.
- Assemble the Galette: Arrange the apple filling in the center of the dough, leaving a 2-inch border all around. Gently fold the edges of the dough over the apples, pleating as needed and leaving the center exposed.
- Add Egg Wash and Sugar: Brush the folded crust edge with beaten egg and sprinkle with coarse sugar, if desired. This gives the galette a golden color and a touch of crunch.
- Bake the Galette: Bake in a preheated 400°F (200°C) oven for 35-40 minutes, or until the crust is golden brown and the apples are tender. Let cool slightly before serving.
Notes
- You can use store-bought pie crust for an even quicker version.
- Try mixing different apple varieties for a more complex flavor.
- Serve warm, optionally with a scoop of vanilla ice cream.
- The galette can be stored covered at room temperature for up to two days.
Nutrition
- Serving Size: 1 slice
- Calories: 230
- Sugar: 13g
- Sodium: 180mg
- Fat: 12g
- Saturated Fat: 7g
- Unsaturated Fat: 4g
- Trans Fat: 0g
- Carbohydrates: 31g
- Fiber: 2g
- Protein: 2g
- Cholesterol: 37mg


Your email address will not be published. Required fields are marked *