
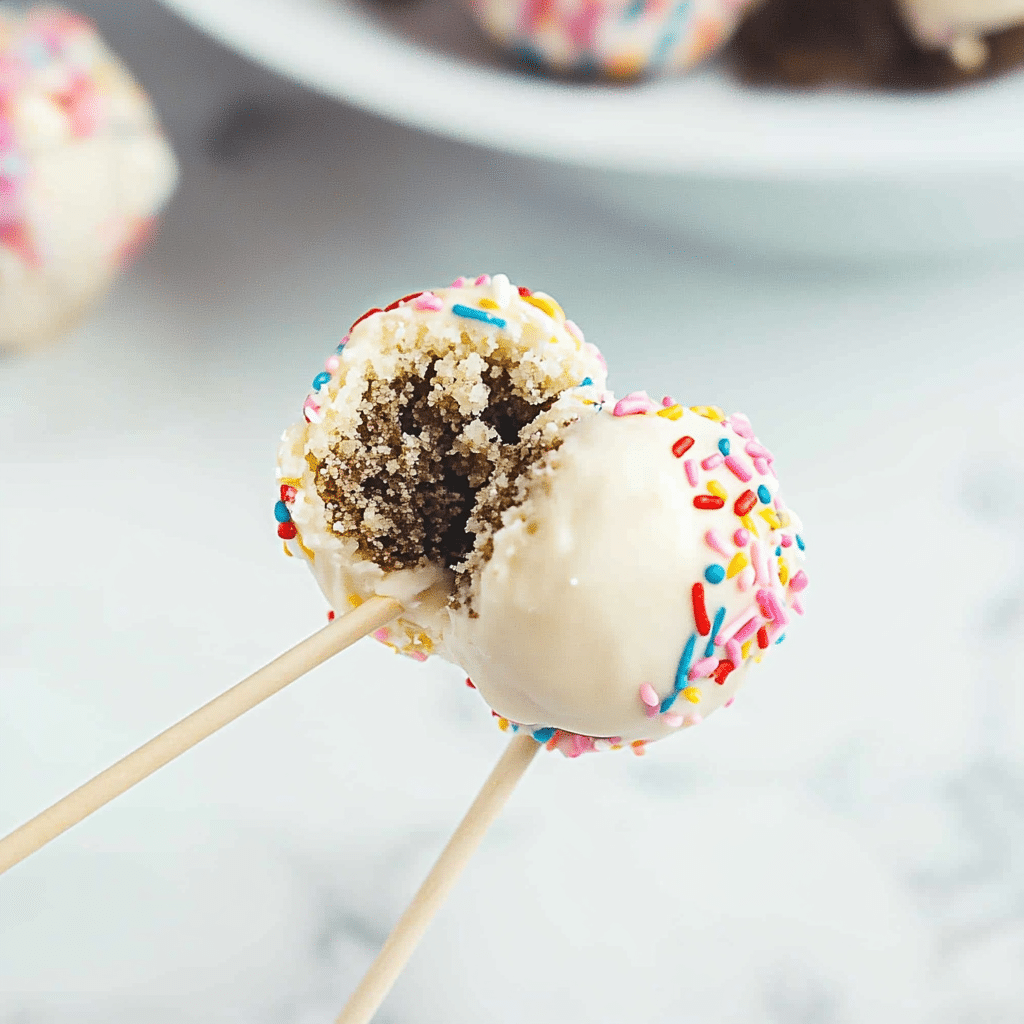
If you’ve ever wanted to make a fun, bite-sized treat that’s perfect for any occasion, cake pops are the way to go! This Easy Cake Pop Recipe is simple to follow and yields delicious, adorable treats that are always a hit at parties or as a sweet snack.
Why You’ll Love This Recipe
- Fun and customizable: Decorate them with your favorite colors, sprinkles, or themes.
- Perfect for any occasion: From birthdays to holidays, these treats always steal the show.
- Easy to make: Simple ingredients and straightforward steps make this recipe a breeze.
- Kid-friendly: Kids love helping decorate these delightful pops.
Ingredients
(Tip: You’ll find the full list of ingredients and measurements in the recipe card below.)
- Crumbled cake (homemade or store-bought)
- Frosting
- Candy melts or chocolate
- Lollipop sticks
- Sprinkles or decorations (optional)
Directions

- Prepare the cake crumbs: Bake your favorite cake or use store-bought cake. Crumble the cake into fine crumbs in a large bowl.
- Mix with frosting: Add a small amount of frosting to the crumbs and mix until it forms a dough-like consistency. Start with a little frosting and add more as needed.
- Form the cake balls: Roll the mixture into small balls, about 1 inch in diameter. Place them on a parchment-lined baking sheet.
- Insert the sticks: Dip one end of a lollipop stick into melted candy melts or chocolate, then insert it into a cake ball. Repeat with all the cake balls. Chill in the refrigerator for 30 minutes.
- Coat the cake pops: Melt your candy melts or chocolate according to the package instructions. Dip each cake pop into the coating, letting any excess drip off.
- Decorate: Add sprinkles or other decorations before the coating sets.
- Set and serve: Let the coated cake pops set completely by placing them in a cake pop stand or Styrofoam block. Enjoy!
Servings and Timing
- Servings: Approximately 20 cake pops
- Prep time: 30 minutes
- Chill time: 30 minutes
- Total time: 1 hour
Variations
- Flavorful combinations: Try red velvet cake with cream cheese frosting or chocolate cake with peanut butter frosting.
- Colorful themes: Use different colored candy melts to match holidays or events.
- Vegan option: Use a vegan cake and frosting, and opt for dairy-free chocolate.
- Gluten-free: Replace the cake with a gluten-free version to accommodate dietary needs.
Storage/Reheating
- Storage: Store cake pops in an airtight container in the refrigerator for up to one week.
- Freezing: You can freeze uncoated cake balls for up to three months. Thaw them in the fridge before coating and decorating.
- Reheating chocolate: If the candy melts or chocolate thickens, gently reheat it in short intervals in the microwave, stirring frequently.
FAQs
1. Can I use store-bought cake mix for this recipe?
Yes, store-bought cake mix works perfectly and saves time.
2. How do I prevent my cake pops from falling off the stick?
Dip the stick in melted chocolate before inserting it into the cake ball to help secure it.
3. What if my coating is too thick?
Thin out the candy melts or chocolate with a small amount of vegetable oil or shortening.
4. Can I make cake pops without sticks?
Absolutely! You can serve them as cake balls without the sticks.
5. How far in advance can I make cake pops?
Cake pops can be made 1-2 days in advance and stored in the refrigerator.
6. Why do my cake pops crack?
Cracking occurs when the cake pops are too cold, and the warm coating causes expansion. Let them sit for a few minutes after chilling before dipping.
7. Can I use leftover cake for this recipe?
Yes, leftover cake is an excellent way to reduce waste and create a new treat.
8. How do I transport cake pops without damaging them?
Use a cake pop stand or wrap them individually in clear plastic bags tied with a ribbon.
9. What’s the best way to melt candy melts?
Microwave in 30-second intervals, stirring between each, or use a double boiler for better control.
10. Can I use chocolate chips instead of candy melts?
Yes, but mix in a teaspoon of oil to ensure a smooth coating.
Conclusion
This Easy Cake Pop Recipe is a delightful and creative way to turn simple ingredients into a show-stopping treat. Perfect for parties, holidays, or a fun baking project, these cake pops are easy to customize and share. Once you try them, you’ll see why they’re a favorite for all ages!
Print
Easy Cake Pop Recipe
- Prep Time: 20 minutes
- Cook Time: 30 minutes
- Total Time: 1 hour, 20 minutes
- Yield: 24 cake pops 1x
- Category: Dessert
- Cuisine: American
- Diet: Vegetarian
Description
Cake pops are delightful bite-sized treats made by combining crumbled cake with frosting, shaping the mixture into balls, and coating them with a sweet chocolate shell. They’re perfect for parties, gatherings, or simply as a fun dessert. Here’s an easy recipe to make approximately 24 cake pops
Ingredients
- 1 box cake mix (any flavor)
- Ingredients as per cake mix instructions (usually water, oil, and eggs)
- 1/3 cup frosting (store-bought or homemade)
- 10 ounces chocolate melting wafers (white, milk, or dark chocolate)
- 24 lollipop sticks
- Sprinkles or other decorations (optional)
Instructions
- Bake the Cake:
- Prepare the cake batter according to the package instructions.
- Pour the batter into a 9×13-inch baking pan and bake as directed.
- Once baked, allow the cake to cool completely.
- Crumble the Cake:
- In a large bowl, crumble the cooled cake into fine crumbs using your hands or a mixer.
- Mix with Frosting:
- Add the frosting to the cake crumbs.
- Mix until the mixture holds together when pressed. If it’s too crumbly, add a bit more frosting.
- Form Cake Balls:
- Using a small cookie scoop or your hands, portion out the mixture and roll into 1-inch balls.
- Place the balls on a baking sheet lined with parchment paper.
- Insert Sticks:
- Melt a small amount of the chocolate wafers according to the package instructions.
- Dip the tip of each lollipop stick into the melted chocolate and insert it halfway into each cake ball.
- This helps secure the stick to the cake ball.
- Chill:
- Place the cake pops in the refrigerator for about 30 minutes to firm up.
- Coat with Chocolate:
- Melt the remaining chocolate wafers in a deep, narrow bowl or cup to make dipping easier.
- Dip each cake pop into the melted chocolate, ensuring it’s fully coated.
- Gently tap off any excess chocolate.
- Decorate:
- While the coating is still wet, add sprinkles or other decorations as desired.
- Dry:
- Place the cake pops upright in a styrofoam block or a cup filled with rice to allow them to dry completely.
Notes
- Storage: Store the finished cake pops in an airtight container at room temperature for up to 3 days or in the refrigerator for up to a week.
- Variations: Feel free to experiment with different cake and frosting flavors, such as chocolate cake with cream cheese frosting or red velvet cake with vanilla frosting.
Your email address will not be published. Required fields are marked *