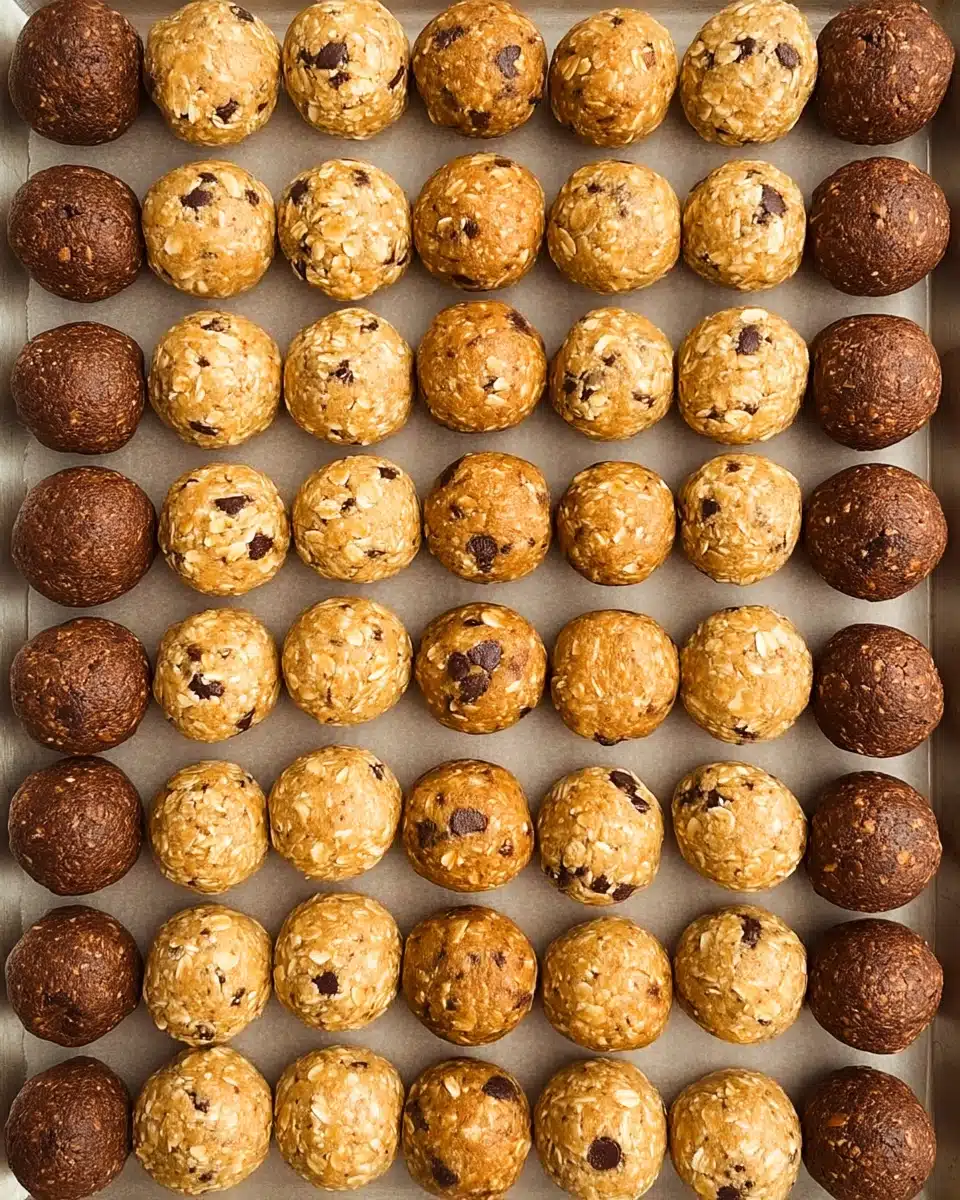
If you’re searching for a crave-worthy snack that’s a cinch to prepare, these Easy No Bake Protein Balls are about to become your new kitchen MVP. Combining wholesome oats, nutty peanut butter, a touch of sweet honey, and a handful of tasty extras, these bite-sized treats strike the perfect balance between convenience and nourishment. Imagine grabbing a portable, homemade snack that keeps you fueled throughout the day – and tastes so good, you’ll look forward to each bite. Whether you’re meal prepping, running late, or just in need of something deliciously energizing, this tried-and-true recipe will quickly earn VIP status in your snack rotation.
Ingredients You’ll Need
There’s something magical about how just a few simple staples can be transformed into such an irresistible snack. Each ingredient in these Easy No Bake Protein Balls brings its own unique texture, flavor, or nutritional punch—think chewy oats, creamy peanut butter, and the sweetness of honey coming together for snack-time bliss.
- Old-fashioned rolled oats: They’re the chewy base, giving each ball substance and a boost of fiber.
- Peanut butter: For richness and natural protein—swap for almond or cashew butter if you prefer!
- Honey: Acts as the natural sweetener, helping everything stick together while adding a lovely floral note.
- Ground flaxseed: Adds a nutty flavor and sneaks in a little extra omega-3 nutrition.
- Chocolate chips: Mini versions work best for even distribution, bringing pockets of melty goodness in every bite.
- Vanilla extract: Just a splash enhances and rounds out all the flavors.
- Pinch of salt: This little addition makes the other flavors pop and keeps things from tasting too sweet.
How to Make Easy No Bake Protein Balls
Step 1: Gather and Measure Your Ingredients
Get everything out on the counter before you start – trust me, it makes the whole process smoother and more fun. Precision matters with sticky ingredients like peanut butter and honey, so use a rubber spatula to get every last bit into your bowl.
Step 2: Mix the Dry Ingredients
Add your rolled oats, ground flaxseed, chocolate chips, and a pinch of salt to a large bowl. Stir them together so that those little chocolate morsels and flaxseed flecks are evenly distributed. Setting the stage with these dry ingredients ensures each protein ball is consistent.
Step 3: Combine Peanut Butter, Honey, and Vanilla
In a separate small bowl, mix your peanut butter, honey, and vanilla extract until smooth. This step guarantees a creamy, uniform mixture that will hold everything together perfectly. If your peanut butter is a bit thick, give it a quick zap in the microwave to make stirring even easier.
Step 4: Mix Wet and Dry Ingredients Together
Pour your gooey peanut butter mixture over the dry ingredients. Now comes the fun part: stir, stir, stir! You want every oat and chocolate chip coated. The dough is meant to be thick and just a bit sticky—if it’s too dry, add a drizzle more honey or nut butter. If it’s too sticky, toss in a few extra oats.
Step 5: Shape into Balls
Using a spoon or small cookie scoop, portion the mixture and roll it between your palms to form bite-sized balls. Place them on a parchment-lined baking sheet or plate as you go. Tip: If the mixture feels too sticky to handle, wetting your hands slightly makes rolling so much easier.
Step 6: Chill and Enjoy
Pop your tray of protein balls in the fridge for at least 30 minutes. This quick chill firms them up and intensifies the flavors—you could sneak one right away, but patience pays off! Once set, transfer them to an airtight container for snacking happiness whenever the craving strikes.
How to Serve Easy No Bake Protein Balls

Garnishes
A classic presentation is always dependable, but a quick roll in crushed nuts, shredded coconut, or a dusting of cocoa powder takes your Easy No Bake Protein Balls to the next level. These playful extras not only make for stunning snack platters but also add new layers of flavor and crunch.
Side Dishes
Think beyond just grabbing one from the fridge—pair your protein balls with a fresh fruit platter, a tall glass of cold milk, or your favorite smoothie for a wholesome breakfast or power-boosted snack break. They’re also right at home alongside Greek yogurt or a hot cup of coffee as a mid-morning treat.
Creative Ways to Present
For parties and potlucks, try stacking your protein balls on a tiered platter or tucking them into colorful mini cupcake liners for a bakery-worthy display. You can even skewer them onto sticks for an energetic twist, or gift them in small cellophane bags tied with ribbon as a thoughtful homemade surprise.
Make Ahead and Storage
Storing Leftovers
Stash your Easy No Bake Protein Balls in an airtight container and keep them in the fridge for up to one week. They stay fresh, keep their shape, and are always ready whenever you need a quick hit of snacking fuel—perfect for packing lunches or grabbing as you dash out the door.
Freezing
If you want to make a big batch, these freeze beautifully! Spread the protein balls on a baking sheet and pop them in the freezer for an hour; then transfer to a freezer-safe bag or container. They’ll keep for up to three months, so you’ll always have a stash ready for busy weeks.
Reheating
No reheating needed—the beauty of these Easy No Bake Protein Balls is that they’re delicious straight from the fridge or thawed at room temperature. If eating from frozen, let them sit out for 10–15 minutes to soften just enough for that perfect chewy bite.
FAQs
Can I use a different nut butter in these Easy No Bake Protein Balls?
Absolutely! Almond, cashew, or even sunflower seed butter all work beautifully. Each brings a unique flavor, so feel free to customize based on your taste or pantry supplies.
How can I make these protein balls vegan?
Swap the honey for maple syrup or agave nectar, and make sure your chocolate chips are dairy-free. The result is every bit as delicious and plant-based friendly.
Do I have to chill the mixture before rolling into balls?
It’s not essential, but chilling the dough for about 10 minutes first makes it less sticky and easier to handle, especially if your kitchen is warm or your peanut butter is extra drippy.
Can I add protein powder to the recipe?
Yes! Just add a scoop of your favorite protein powder and reduce the oats slightly to keep the consistency perfect. Vanilla or chocolate protein powders both taste amazing in this recipe.
How long do Easy No Bake Protein Balls last?
Stored properly in the fridge, they’ll stay fresh for up to a week. For longer storage, keep them in the freezer and thaw individual portions as needed.
Final Thoughts
If you’re ready for a wholesome, utterly tasty snack that comes together in a snap, these Easy No Bake Protein Balls truly deliver. I’m so excited for you to fall in love with how easy, adaptable, and satisfying they are—don’t be surprised if they become your go-to snack for every occasion!
Print
Easy No Bake Protein Balls Recipe
- Prep Time: 10 minutes
- Cook Time: 0 minutes
- Total Time: 40 minutes (includes chilling)
- Yield: 18–20 balls 1x
- Category: Snacks
- Method: No-cook
- Cuisine: American
- Diet: Vegetarian
Description
These Easy No Bake Protein Balls are a delicious and convenient snack, packed with wholesome ingredients like oats, nut butter, and chocolate chips. Perfect for meal prep, post-workout refueling, or a healthy on-the-go bite, they require no baking and come together in just minutes.
Ingredients
Dry Ingredients
- 1 cup old-fashioned rolled oats
- 1/3 cup chocolate chips (mini or regular)
- 2 tablespoons ground flaxseed
- 1/4 teaspoon salt
Wet Ingredients
- 1/2 cup creamy peanut butter (or almond butter)
- 1/4 cup honey (or maple syrup)
- 1 teaspoon vanilla extract
Protein
- 1/2 cup protein powder (vanilla or chocolate, as preferred)
Instructions
- Mix Dry Ingredients: In a large bowl, combine the rolled oats, chocolate chips, ground flaxseed, protein powder, and salt. Stir everything together to ensure the ingredients are evenly distributed.
- Add Wet Ingredients: Add the peanut butter, honey, and vanilla extract to the bowl with the dry mixture. Use a sturdy spoon or spatula to mix thoroughly until a cohesive dough forms. If the mixture feels too dry or crumbly, add a teaspoon of milk or water at a time until it holds together easily.
- Chill the Mixture: Cover the bowl and refrigerate the mixture for about 20-30 minutes. This helps the dough firm up, making it easier to roll into balls.
- Shape Protein Balls: Using your hands or a small cookie scoop, form the mixture into balls about 1 inch in diameter. Place the finished balls on a parchment-lined tray or plate.
- Store and Enjoy: Protein balls can be enjoyed immediately, or stored in an airtight container in the refrigerator for up to 1 week. For longer storage, freeze for up to 3 months.
Notes
- You can swap peanut butter with any nut or seed butter to suit allergies or preferences.
- For a vegan version, use maple syrup and plant-based protein powder.
- Customize with add-ins like chia seeds, dried fruit, or shredded coconut.
- If the mixture is too sticky, stir in additional oats; if too dry, add more honey or a splash of milk.
Nutrition
- Serving Size: 1 ball
- Calories: 90
- Sugar: 4g
- Sodium: 35mg
- Fat: 5g
- Saturated Fat: 1g
- Unsaturated Fat: 3g
- Trans Fat: 0g
- Carbohydrates: 9g
- Fiber: 1.5g
- Protein: 3.5g
- Cholesterol: 0mg


Your email address will not be published. Required fields are marked *