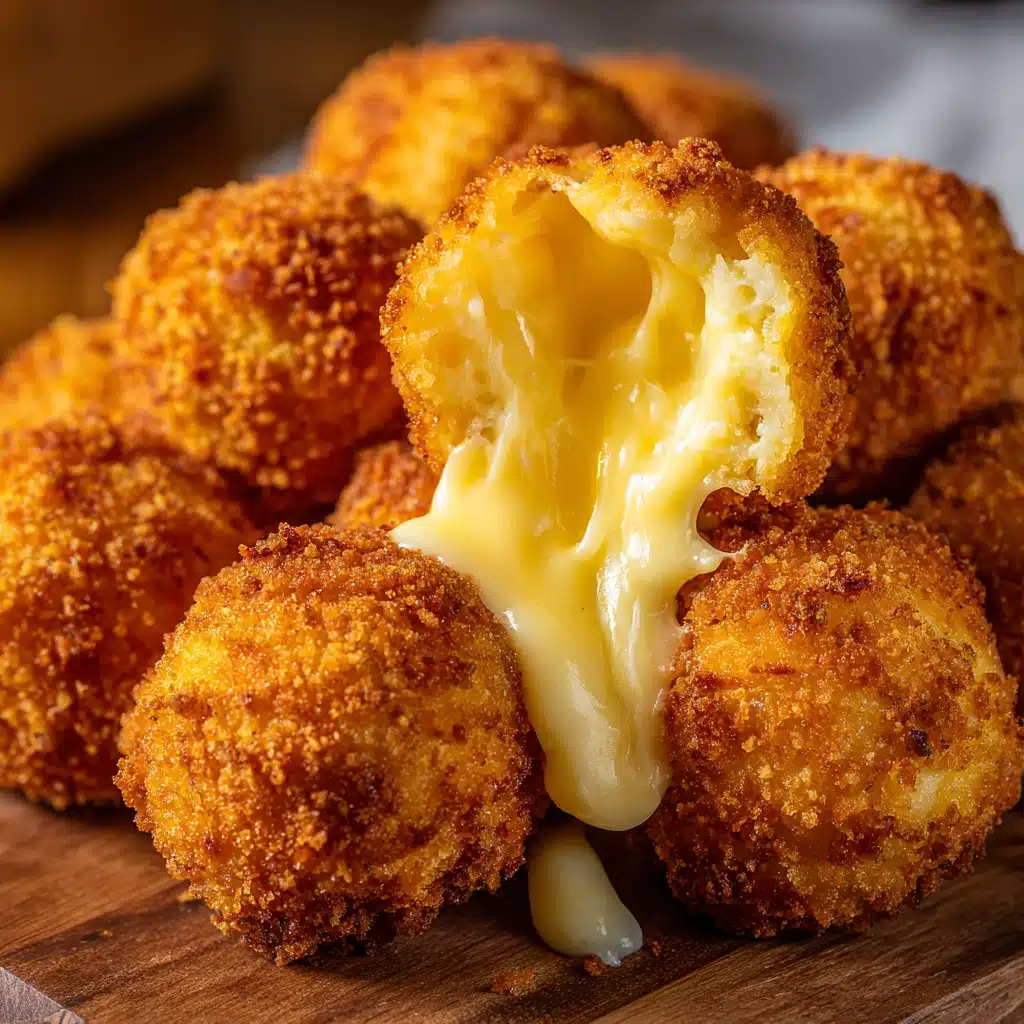
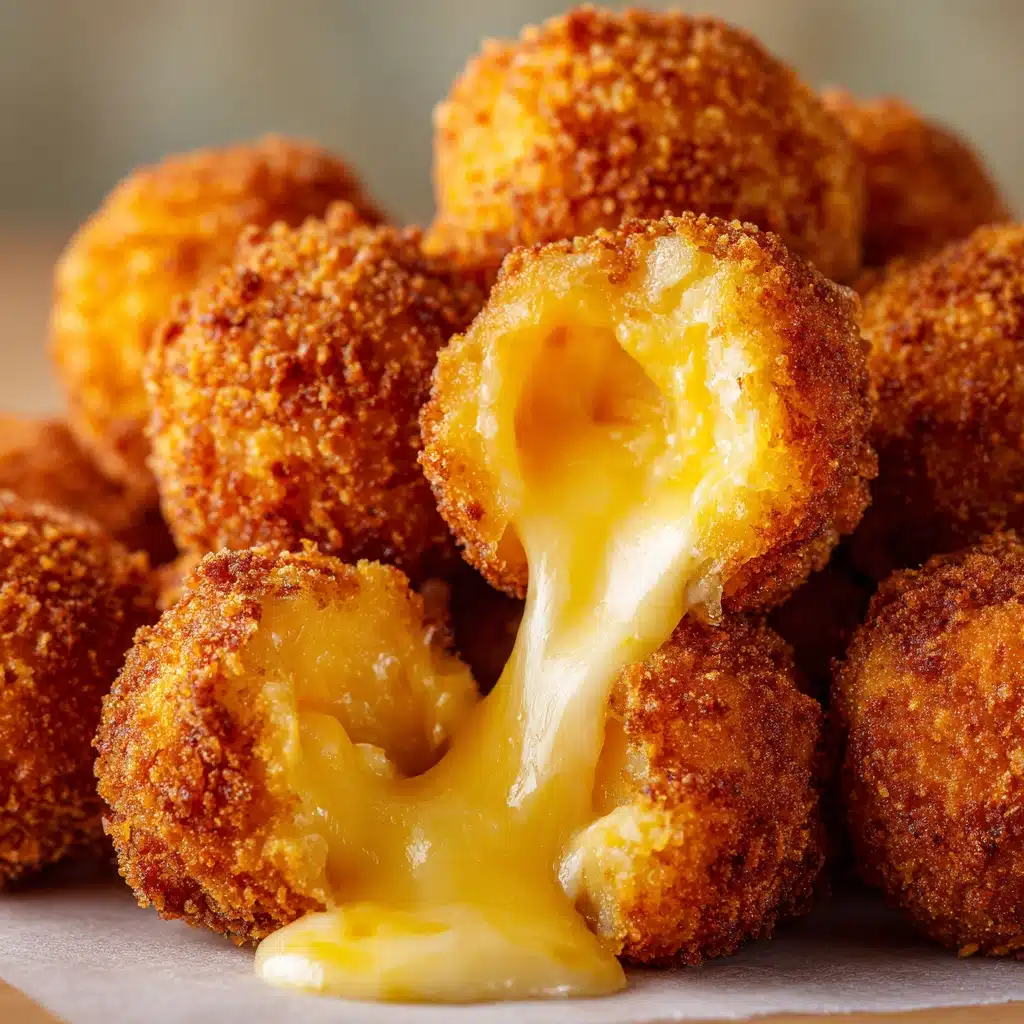
If there’s ever a party snack that instantly wins hearts, it’s Fried Cheese Balls. Crispy, golden on the outside and delightfully melty on the inside, these bite-sized treats have a knack for stealing the spotlight at gatherings and family nights alike. Whether you’re prepping them for a cozy movie evening or need a crowd-pleasing appetizer, Fried Cheese Balls promise pure cheesy bliss in every bite, making them an irresistible addition to your snack repertoire.
Ingredients You’ll Need
Just a handful of simple, everyday ingredients come together to create these mouthwatering Fried Cheese Balls, each one playing a vital role in the perfect crunch and creamy melt. Here’s exactly what you need and why they matter:
- Cheese (Mozzarella, Cheddar, or a Mix): The star of the show! Choose a melty, flavorful cheese for a gooey center and ultimate cheese pull.
- All-Purpose Flour: Acts as the first coating to help the batter cling to the cheese, ensuring nothing leaks out during frying.
- Eggs: Essential for binding—dip the flour-coated cheese balls in beaten eggs for another barrier that helps breadcrumbs stick beautifully.
- Bread Crumbs (Panko or Regular): Responsible for that ultra-crispy, golden exterior; Panko gives extra crunch, but any breadcrumb works.
- Salt & Pepper: A simple addition to season each layer for deeper, richer flavor throughout every bite.
- Italian Seasoning or Dried Herbs (Optional): Adds a hint of herby aroma, making the flavor profile more exciting—totally customizable!
- Oil for Frying: Choose a neutral oil with a high smoke point, like canola or vegetable oil, to get that gorgeous golden crust without overwhelm.
How to Make Fried Cheese Balls
Step 1: Prepare the Cheese Balls
Cut your cheese into even, bite-sized cubes—about one inch each works perfectly. If you’d like an even meltier center, you can use room temperature cheese, but chilled cubes hold together better for shaping. Roll each piece between your palms to form smooth balls, and set them aside on a plate. If your cheese is stubborn, dampen your hands just a little to prevent sticking.
Step 2: Set Up the Breading Station
Line up three shallow bowls: one with all-purpose flour (seasoned lightly with salt and pepper), one with beaten eggs, and one with breadcrumbs (add Italian seasoning here if you like). This assembly line setup keeps things smooth and tidy as you coat each ball.
Step 3: Coat the Cheese Balls
First, roll each formed cheese ball in the flour, tapping off any excess. Next, dip it into the egg, ensuring it’s coated on all sides, then toss it gently in the breadcrumbs. For an extra crispy result (and extra insurance against leaks), double dip the balls: return them for a second egg and breadcrumb layer. Place the finished balls on a sheet pan and chill for at least 15–20 minutes before frying—this step helps them keep their shape in the hot oil.
Step 4: Fry to Golden Perfection
Pour about 2 inches of oil into a heavy pan and heat it to 350°F (175°C). Fry the cheese balls in small batches, turning as needed, until golden and crisp—usually 2–3 minutes per batch. Don’t overcrowd the pan or the temperature will drop and make them greasy. Use a slotted spoon to remove the Fried Cheese Balls, draining them on paper towels.
Step 5: Cool Slightly Before Serving
Let the Fried Cheese Balls rest for a minute—this helps the molten cheese slightly firm up and avoids scalding tongues. That anticipation just makes the first bite even better!
How to Serve Fried Cheese Balls

Garnishes
Let your creativity shine with the finishing touches! A light sprinkle of chopped fresh parsley or chives on your Fried Cheese Balls adds freshness and color, while a dusting of grated parmesan brings a savory hit. Some even like a pinch of smoky paprika for a subtle kick and beautiful hue.
Side Dishes
Pair these golden bites with cool, crunchy salads or vibrant veggie sticks to balance their richness. A tangy tomato salsa, garlic aioli, or classic marinara dipping sauce elevates the experience, complementing the gooey cheese and crispy shell perfectly.
Creative Ways to Present
Go beyond the plate! Try skewering Fried Cheese Balls onto toothpicks for party platters, nestling them into tiny waffle cones for a whimsical twist, or building a “cheese ball tower” as a centerpiece. You can even serve them in a paper-lined basket for fun, casual sharing.
Make Ahead and Storage
Storing Leftovers
Cool any extras completely before transferring to an airtight container. Refrigerate for up to three days; the breading stays reasonably crisp, and that cheesy core remains temptingly melty after a quick reheat.
Freezing
To freeze, arrange uncooked, breaded cheese balls on a baking sheet and freeze until solid, then store in a zip-top bag for up to two months. Fry directly from frozen—just add an extra minute or two, ensuring the inside is heated through.
Reheating
For best results, reheat Fried Cheese Balls in a hot oven or air fryer at 375°F (190°C) for 6–8 minutes, restoring their signature crunch. Microwaving works in a pinch but beware: it can make the coating a bit soggy, so oven or air fryer is the way to go!
FAQs
Can I make Fried Cheese Balls in advance?
Absolutely! You can shape and bread the cheese balls ahead of time and keep them in the refrigerator for a day or freeze them for longer. Fry just before serving for ultimate crispiness.
Which cheese is best for Fried Cheese Balls?
Mozzarella yields that dreamy cheese pull, but a mix with sharp cheddar adds more flavor depth. Feel free to experiment with pepper jack or gouda for fun twists.
Is it possible to bake instead of fry?
Yes! For a lighter version, bake breaded cheese balls on a lined sheet at 400°F (200°C) for 10-12 minutes, turning once. They won’t be quite as golden but still delicious.
How do I keep the cheese from leaking during frying?
Double-breading is key! Also, chilling the balls before frying helps the coating firm up and keeps the cheese securely inside as it melts.
Can I make these gluten-free?
Certainly—just use your favorite gluten-free flour and breadcrumbs. The process and results should be just as satisfying and crispy.
Final Thoughts
If you’re hunting for a guaranteed hit at your next gathering or just want to treat yourself to an undeniably delicious snack, give these Fried Cheese Balls a try. They’re as fun to make as they are to eat—so grab your favorite cheese and start rolling! Your taste buds (and your friends) will thank you.
Print
Fried Cheese Balls Recipe
- Prep Time: 20 minutes (plus 30 minutes chilling)
- Cook Time: 10 minutes
- Total Time: 1 hour
- Yield: 15–18 cheese balls 1x
- Category: Snacks
- Method: Frying
- Cuisine: Global/Western
- Diet: Vegetarian
Description
Crispy on the outside and delightfully gooey on the inside, these Fried Cheese Balls are the perfect bite-sized snack or appetizer. Made with a blend of cheeses, coated in golden breadcrumbs, and deep-fried until perfectly crunchy, they’re irresistible for parties, game nights, or whenever the craving for something cheesy strikes.
Ingredients
For the Cheese Balls
- 1 cup shredded mozzarella cheese
- 1/2 cup shredded cheddar cheese
- 2 tablespoons cream cheese, softened
- 2 tablespoons all-purpose flour
- 1 tablespoon cornflour (cornstarch)
- 1/2 teaspoon black pepper
- 1/4 teaspoon garlic powder
- 1/4 teaspoon chili flakes (optional)
- Salt to taste
For Coating
- 1/2 cup all-purpose flour
- 1 egg, beaten
- 1 cup breadcrumbs (preferably panko for extra crunch)
For Frying
- Vegetable oil, for deep frying
Instructions
- Prepare the Cheese Mixture: In a mixing bowl, combine the mozzarella, cheddar, and cream cheese. Add the all-purpose flour, cornflour, black pepper, garlic powder, chili flakes (if using), and salt. Mix thoroughly until all ingredients are well incorporated and form a soft dough that can be easily shaped.
- Shape the Cheese Balls: Take small portions of the cheese mixture and roll them between your palms to form smooth, bite-sized balls. Place the shaped balls on a plate or tray lined with parchment paper. You should get about 15-18 balls from this mixture.
- Coat the Cheese Balls: Dredge each cheese ball in all-purpose flour, then dip in the beaten egg to coat completely, and finally roll in the breadcrumbs until fully covered. For extra crunch, you can repeat the egg and breadcrumb steps for a double coating.
- Chill the Balls: Place the coated cheese balls in the refrigerator for at least 30 minutes to help them firm up and prevent bursting during frying.
- Heat the Oil: In a deep frying pan or heavy-bottomed saucepan, heat enough vegetable oil over medium-high heat to immerse the cheese balls. The oil temperature should reach about 350°F (175°C).
- Fry the Cheese Balls: Carefully add the chilled cheese balls to the hot oil in batches, being careful not to overcrowd the pan. Fry for 2-3 minutes, turning occasionally, until they are uniformly golden brown and crispy. Remove with a slotted spoon and drain on paper towels.
- Serve: Let the cheese balls cool for a minute or two, then serve hot with your favorite dipping sauce such as marinara, ranch, or spicy ketchup.
Notes
- Use cold cheese and chill the coated balls before frying to prevent leaking or bursting.
- You can substitute cheeses as desired—try adding gouda or pepper jack for a twist!
- Double-coating with breadcrumbs gives extra crunch.
- For a vegetarian option, ensure the cheeses contain no animal rennet.
- Bake in a preheated oven at 400°F (200°C) for 12-15 minutes as a lighter alternative.
Nutrition
- Serving Size: 3 cheese balls
- Calories: 210
- Sugar: 1g
- Sodium: 390mg
- Fat: 14g
- Saturated Fat: 8g
- Unsaturated Fat: 4g
- Trans Fat: 0g
- Carbohydrates: 11g
- Fiber: 0.5g
- Protein: 9g
- Cholesterol: 46mg


Your email address will not be published. Required fields are marked *