If you’re searching for a mouthwatering, crowd-pleasing meal that brings together all the best parts of a juicy burger in a fun, dippable form, look no further than these Garlic Butter Beef Cheeseburger Rollups! Imagine savory ground beef, gooey melted cheese, tangy pickles, and soft crescent dough all wrapped up and finished with a brush of garlicky butter. Each bite delivers nostalgic cheeseburger flavors in a delightfully portable package, making these rollups an instant hit for game days, family dinners, or any time you want something irresistibly cheesy and comforting.
Ingredients You’ll Need
The beauty of Garlic Butter Beef Cheeseburger Rollups! is in the simplicity and synergy of the ingredients—each component brings flavor, texture, or a pop of color to every bite. Let’s break down what you need and why it matters:
- Ground Beef: The heart of the rollup, offering savory, meaty goodness that builds the “cheeseburger” foundation.
- Onion: Adds sweet, aromatic depth and balances the richness of the beef.
- Cheddar Cheese: Melts beautifully for that classic cheeseburger flavor and creamy texture.
- Crescent Dough Sheets: Convenient, fluffy, and golden brown—perfect for wrapping up all the goodness.
- Dill Pickles: Bring a punchy, tangy contrast that brightens each bite.
- Garlic Cloves: The star of the buttery topping, lending rich aromatic flavor.
- Butter: Turns the outside golden and crispy while infusing garlic flavor right where it counts.
- Salt & Pepper: Essential for elevating each ingredient and pulling all the flavors together.
- Sesame Seeds (optional): Give the rollups that classic “burger bun” finish and beautiful texture.
How to Make Garlic Butter Beef Cheeseburger Rollups!
Step 1: Brown the Beef and Aromatics
Start by heating a large skillet over medium-high heat. Toss in your ground beef and cook until it’s nearly browned, breaking it up with a spoon as you go. Add the finely chopped onion and continue sautéing until the onion is soft and translucent. Season with salt and pepper, then remove from the heat and let the mixture cool slightly—this ensures the cheese won’t melt away before baking.
Step 2: Prepare the Dough
While the beef is cooling, roll out the crescent dough sheets on a lightly floured surface. Pat the dough out into large rectangles, pinching any perforations if you’re using pre-cut crescent rolls. The dough should be even, but not stretched too thin, to prevent any breakage when filling and rolling.
Step 3: Add Fillings
Scatter the cooled beef and onion mixture evenly across the dough, leaving a small border around the edges. Top with shredded cheddar cheese, making sure you cover every corner for that cheesy satisfaction in each bite. Sprinkle on chopped dill pickles for a zingy kick that really channels cheeseburger vibes.
Step 4: Roll and Slice
Gently roll up the dough, starting from one long edge to form a log. Use a serrated knife to slice the roll into individual rounds—aim for about one to one and a half inches thick, so each rollup is hearty without being too big. Place the rollups, cut-side up, on a parchment-lined baking sheet with a little space between each.
Step 5: Brushed with Garlic Butter
Melt butter in a small bowl and stir in minced garlic. Generously brush each rollup with the garlic butter, letting the flavors soak into the dough. If you love the look and extra flavor, sprinkle sesame seeds over the tops for that iconic cheeseburger finish.
Step 6: Bake Until Golden
Slide the tray into a preheated oven and bake at 375°F (190°C) for 15–18 minutes, or until the rollups are beautifully golden and your kitchen smells like a cheeseburger paradise. Let them cool for a couple of minutes before serving—they smell incredible, but that cheese gets hot!
How to Serve Garlic Butter Beef Cheeseburger Rollups!
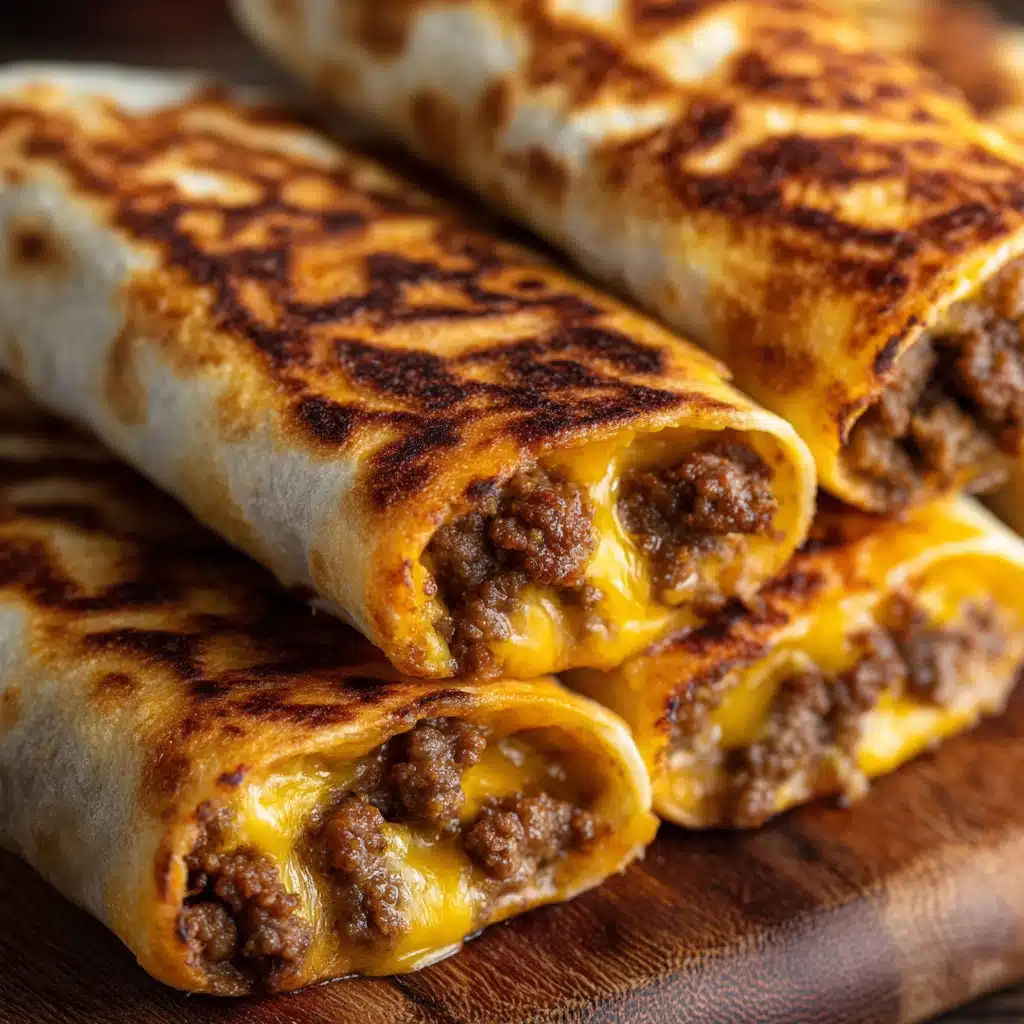
Garnishes
Dress up your Garlic Butter Beef Cheeseburger Rollups! with a scattering of chopped fresh parsley for a burst of color, or offer little bowls of ketchup, mustard, or burger sauce for dunking. A sprinkle of extra sesame seeds or even sliced scallions can add a finishing touch that looks as good as it tastes.
Side Dishes
For a full-on diner experience, serve these rollups with a side of crispy shoestring fries, classic potato chips, or a loaded coleslaw. If you want to lighten things up, a simple green salad with a zesty vinaigrette balances the richness beautifully.
Creative Ways to Present
Turn Garlic Butter Beef Cheeseburger Rollups! into party fare by arranging them on a platter with an array of dipping sauces so guests can sample and mingle. For family dinner, pair with pickled veggies and a big pitcher of iced tea for a casual, hands-on meal that gets everyone talking and reaching for seconds.
Make Ahead and Storage
Storing Leftovers
Leftover Garlic Butter Beef Cheeseburger Rollups! store surprisingly well. Place cooled rollups in an airtight container and refrigerate for up to three days. The flavors continue to meld, making them extra delicious the next day.
Freezing
If you want to prepare these rollups ahead, freeze unbaked slices on a sheet pan until solid, then transfer to a zip-top freezer bag. Bake straight from frozen, adding a few extra minutes to the cooking time, for fresh, cheesy rollups in a pinch.
Reheating
To reheat, simply arrange rollups on a baking sheet and warm in a 350°F (175°C) oven for about 10 minutes, or until heated through and the cheese is gooey again. For crisp edges, skip the microwave and stick with the oven or even an air fryer.
FAQs
Can I make Garlic Butter Beef Cheeseburger Rollups! with ground turkey?
Absolutely! Ground turkey makes a lighter but still flavorful alternative to beef. Simply season well and follow the same directions for delicious results.
Is there a way to make these rollups vegetarian?
For a vegetarian twist, try swapping in plant-based ground meat or a hearty mushroom and lentil mixture. The flavors work beautifully with vegetarian fillings as long as you keep the cheese and those crucial pickles.
Can I use pizza dough instead of crescent dough?
Pizza dough works just fine, though the texture will be a bit chewier. Roll it thin to keep each rollup from getting too bready—otherwise, assemble the same way and bake until golden and cooked through.
What cheese is best for Garlic Butter Beef Cheeseburger Rollups!?
Sharp cheddar is classic, but feel free to mix in Monterey Jack, American, or pepper jack for extra flavor and meltiness. A blend can create a gooier, more complex cheese pull.
How do I keep the rollups from unraveling in the oven?
Be sure to roll the dough tightly and place the seam side down on the baking tray. Chilling the unbaked rollups for 10 minutes before baking can also help them hold their shape beautifully.
Final Thoughts
These Garlic Butter Beef Cheeseburger Rollups! are pure comfort, guaranteed to disappear quickly wherever you serve them. Whether you’re feeding a crowd or just craving a fun twist on dinner, you can’t go wrong with this recipe. Gather your ingredients and get rolling—you’re about to discover a new favorite!
Print
Garlic Butter Beef Cheeseburger Rollups! Recipe
- Prep Time: 20 minutes
- Cook Time: 20 minutes
- Total Time: 40 minutes
- Yield: 10–12 rollups 1x
- Category: Snacks
- Method: Baking
- Cuisine: American
- Diet: Halal
Description
Garlic Butter Beef Cheeseburger Rollups are a fun, flavorful twist on the classic cheeseburger, wrapped in golden-brown dough brushed with savory garlic butter. These gooey, beefy rollups are perfect for parties, snacks, or weeknight comfort meals—kid-friendly, easy to make, and packed with melty cheese and juicy ground beef.
Ingredients
Beef Filling
- 1 lb (450g) ground beef
- 1 small onion, finely chopped
- 2 cloves garlic, minced
- 1/2 tsp salt
- 1/4 tsp black pepper
- 2 tbsp ketchup
- 1 tbsp yellow mustard
Assembly
- 1 can (8 oz) refrigerated crescent roll dough (or pizza dough)
- 1 cup shredded cheddar cheese
- 1/2 cup shredded mozzarella cheese
Garlic Butter
- 3 tbsp unsalted butter, melted
- 2 cloves garlic, minced
- 1 tbsp fresh parsley, finely chopped (optional)
Instructions
- Sauté the Beef Filling: In a large skillet over medium heat, cook the ground beef until it starts to brown, breaking it up with a spoon. Add the chopped onion and minced garlic, and cook until the onion is softened and the beef is no longer pink, about 5-7 minutes. Season with salt and pepper, then stir in ketchup and mustard. Cook for another 2 minutes until combined. Remove from heat and let cool slightly.
- Prepare the Dough: Preheat your oven to 375°F (190°C). Unroll the crescent or pizza dough onto a lightly floured surface. If using crescent dough, pinch any seams together to create a single sheet.
- Add the Filling: Evenly spread the cooled beef mixture over the dough, leaving a half-inch border around the edges. Top with shredded cheddar and mozzarella cheese.
- Roll and Slice: Starting at one long side, roll up the dough tightly to form a log. Pinch the ends to seal. Use a sharp knife to cut the log into 10-12 even pieces.
- Bake: Arrange the rollups, spiral side up, on a parchment-lined baking sheet, spacing them slightly apart. Bake in the preheated oven for 15-18 minutes, or until golden brown and bubbly.
- Brush with Garlic Butter: While the rollups bake, mix the melted butter, minced garlic, and parsley together. As soon as the rollups come out of the oven, generously brush them with the garlic butter.
- Serve: Let the rollups cool for a few minutes before serving. Serve warm, with ketchup or your favorite dipping sauce on the side.
Notes
- Customize the filling by adding diced pickles, cooked bacon, or jalapeños for extra zing.
- Use pizza dough for a chewier texture, or crescent roll dough for a flakier bite.
- For mini rollups, cut the dough log into smaller pieces and reduce baking time slightly.
- Leftovers can be stored in an airtight container and reheated in the oven or air fryer for best results.
- Brush with extra garlic butter for a richer flavor!
Nutrition
- Serving Size: 1 rollup
- Calories: 210
- Sugar: 2g
- Sodium: 400mg
- Fat: 12g
- Saturated Fat: 6g
- Unsaturated Fat: 5g
- Trans Fat: 0g
- Carbohydrates: 15g
- Fiber: 1g
- Protein: 11g
- Cholesterol: 38mg


Your email address will not be published. Required fields are marked *