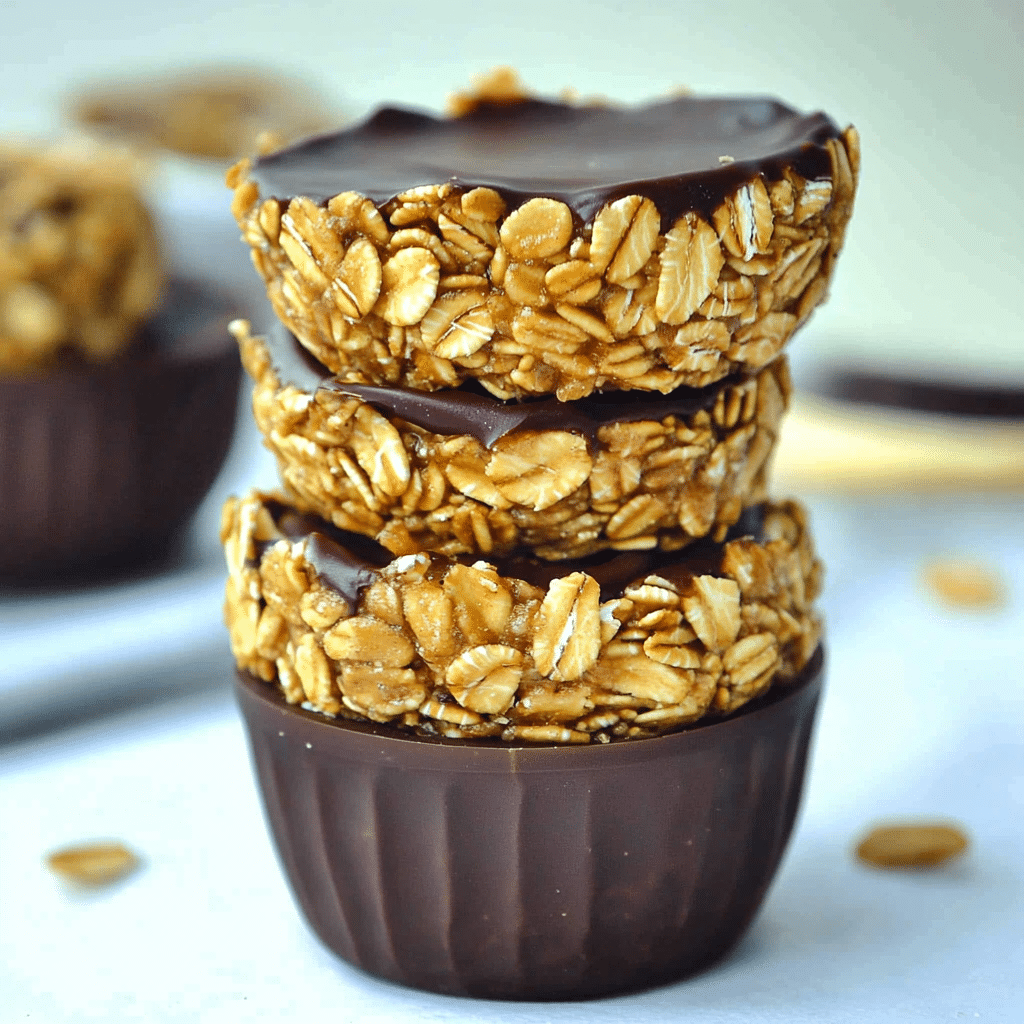
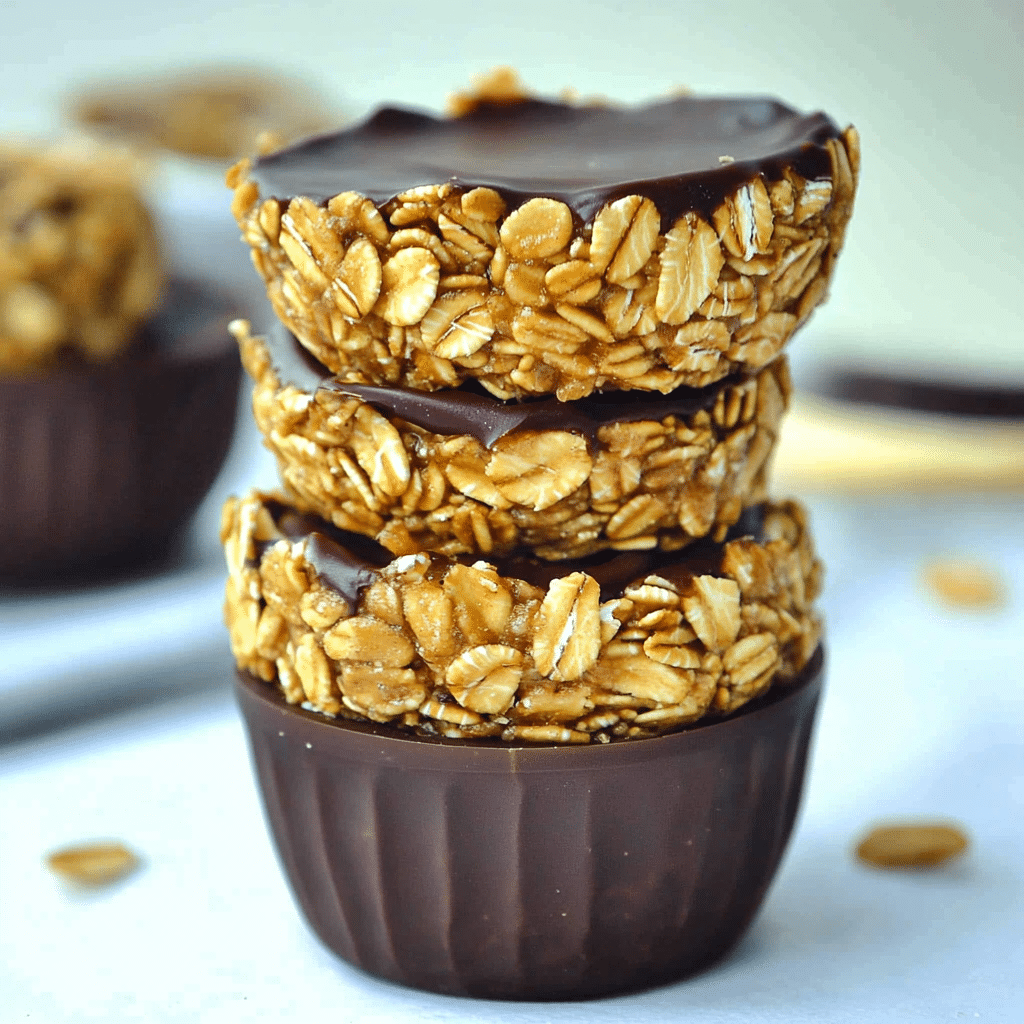
These no-bake peanut butter granola cups are a quick, delicious, and healthy snack perfect for on-the-go energy boosts. Made with simple ingredients like peanut butter, honey, oats, and chocolate, they offer a balance of flavors and textures that will satisfy your cravings. You can whip up a batch in just a few minutes, and they’re great for meal prep!
Why You’ll Love This Recipe
- Quick and easy – No baking required, making it perfect for busy days.
- Healthy – Packed with fiber from oats and healthy fats from peanut butter.
- Kid-friendly – A perfect snack that both kids and adults will love.
- Customizable – You can add your favorite toppings like nuts, seeds, or dried fruits.
- Perfect for meal prep – These cups can be made ahead and stored for a ready-to-eat snack.
Ingredients
(Tip: You’ll find the full list of ingredients and measurements in the recipe card below.)
- Peanut butter
- Honey or maple syrup
- Rolled oats
- Vanilla extract
- Salt
- Chocolate chips (optional for topping)
- Coconut oil (optional for smooth texture)
Directions
- In a medium-sized saucepan, melt the peanut butter and honey (or maple syrup) together over low heat, stirring constantly until smooth and well combined.
- Remove the mixture from heat and stir in the vanilla extract and salt.
- Add the rolled oats to the peanut butter mixture and stir until all the oats are coated and combined.
- Line a muffin tin with paper liners or use a silicone muffin tray. Divide the mixture evenly into the muffin cups, pressing it down firmly to form a solid base.
- Melt the chocolate chips and coconut oil in the microwave in 30-second increments, stirring until smooth. Drizzle the melted chocolate over each granola cup for an added treat.
- Place the muffin tin in the refrigerator for about 1-2 hours or until the granola cups are set and firm.
- Once set, remove the granola cups from the muffin tin and enjoy!
Servings and Timing
- Servings: Makes about 12 granola cups
- Prep Time: 10 minutes
- Chill Time: 1-2 hours
Variations
- Nut-free: Swap peanut butter for a nut-free alternative like sunflower seed butter.
- Gluten-free: Use certified gluten-free oats to make this recipe safe for those with gluten sensitivity.
- Extra protein: Add a scoop of protein powder to the oat mixture for an added boost.
- Different toppings: Sprinkle chopped nuts, chia seeds, or shredded coconut on top before refrigerating.
- Dairy-free: Use dairy-free chocolate chips and coconut oil for the drizzle.
Storage/Reheating
- Storage: Store the granola cups in an airtight container in the refrigerator for up to 1 week.
- Freezing: These can also be frozen for up to 3 months. Thaw them in the fridge overnight before enjoying.
- Reheating: No reheating is necessary, just enjoy them cold or at room temperature.
FAQs
How long do these granola cups last?
They last up to a week in the fridge and can be frozen for up to 3 months.
Can I use a different nut butter?
Yes, almond butter, cashew butter, or sunflower seed butter all work well.
Do I have to use coconut oil?
Coconut oil helps make the chocolate drizzle smoother, but it’s optional.
Can I make this recipe vegan?
Yes! Use maple syrup instead of honey and dairy-free chocolate chips to make this recipe vegan.
Can I add protein powder to this recipe?
Yes, you can add a scoop of your favorite protein powder to the oat mixture for an extra protein boost.
What can I use instead of oats?
You can try using puffed rice or quinoa flakes for a different texture, but oats provide the best consistency.
How should I press the mixture into the muffin cups?
Using the back of a spoon or your fingers, press the mixture down firmly to make sure it holds together.
Can I use quick oats instead of rolled oats?
Yes, but the texture will be a bit different. Rolled oats give a chewier texture, while quick oats make it softer.
Can I omit the chocolate drizzle?
Yes, the granola cups taste great on their own, but the chocolate adds a delicious treat.
Can I use agave syrup instead of honey or maple syrup?
Yes, agave syrup can be used as a substitute, but it will be a bit sweeter than honey or maple syrup.
Conclusion
No-bake peanut butter granola cups are the perfect grab-and-go snack that’s both healthy and delicious. With minimal effort and a few simple ingredients, you can enjoy a batch of these anytime. Whether you make them for meal prep, a quick snack, or a school lunch, they’re bound to be a hit with everyone. Customize them to your taste, and enjoy them chilled or straight from the fridge!
Print
No Bake Peanut Butter Granola Cups
- Prep Time: 10 minutes
- Cook Time: None
- Total Time: 10 minutes
- Yield: 12 granola cups 1x
- Category: Snack, Breakfast
- Method: No-Bake
- Cuisine: American
- Diet: Vegetarian
Description
These no-bake peanut butter granola cups are a quick, easy, and healthy snack or breakfast treat! Made with simple ingredients, they’re packed with protein, fiber, and a touch of sweetness, perfect for any time of day.
Ingredients
- 2 cups old-fashioned rolled oats
- 1/2 cup peanut butter (creamy or natural)
- 1/3 cup honey or maple syrup
- 1/4 cup mini chocolate chips (optional)
- 1/4 cup chopped nuts (optional)
- 1/2 teaspoon vanilla extract
- Pinch of salt
Instructions
- In a large bowl, combine the oats, mini chocolate chips, and chopped nuts (if using).
- In a small microwave-safe bowl, mix the peanut butter and honey (or maple syrup). Microwave for 20–30 seconds until slightly warm and easy to mix. Stir in the vanilla extract and a pinch of salt.
- Pour the peanut butter mixture over the dry ingredients. Mix until everything is well coated.
- Line a muffin tin with paper liners or lightly grease each cup. Divide the mixture evenly into the cups, pressing firmly to pack them down.
- Refrigerate for 1–2 hours or until firm.
- Once set, remove from the tin and store in an airtight container in the refrigerator for up to 1 week.
Notes
- You can swap peanut butter for almond butter or sunflower seed butter for a nut-free option.
- For extra sweetness, drizzle melted chocolate on top before refrigerating.


Your email address will not be published. Required fields are marked *