
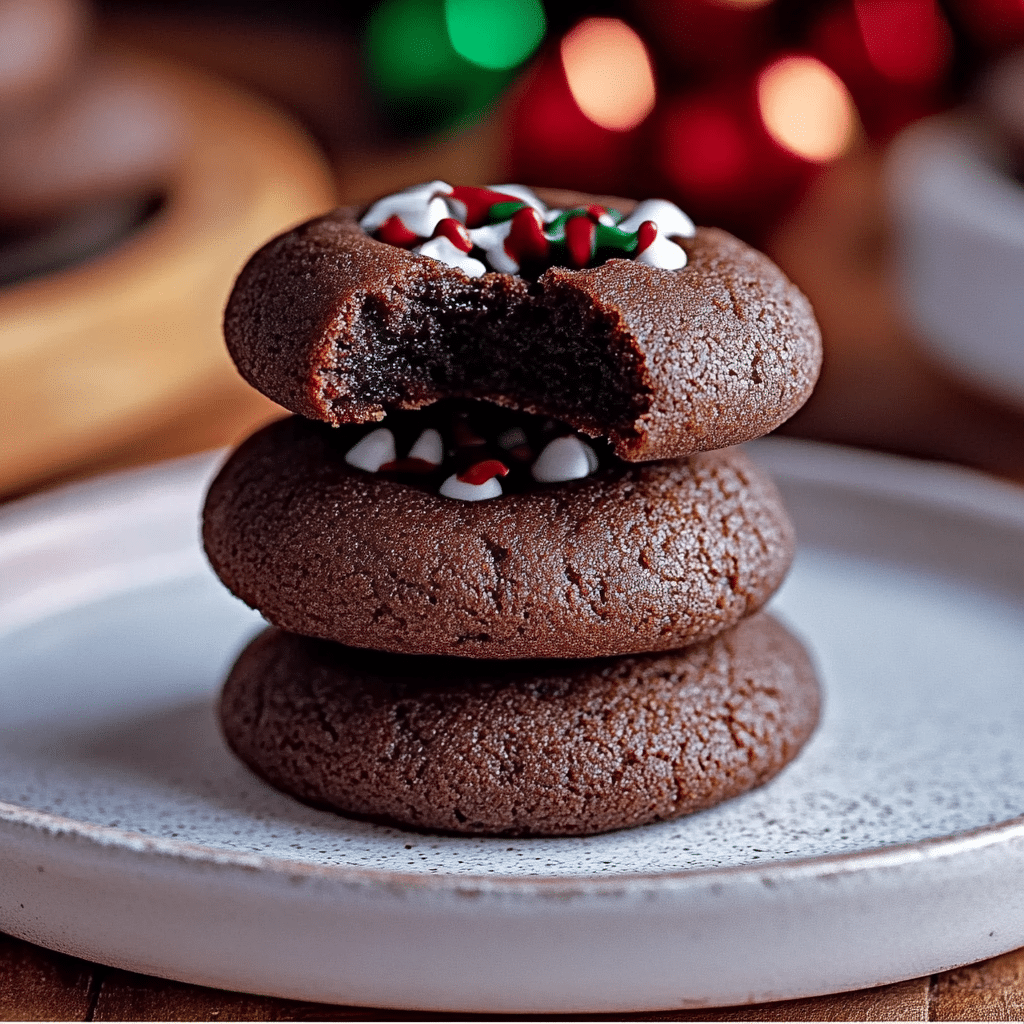
Chocolate Thumbprint Cookies are a delightful treat that perfectly blend a buttery cookie base with a luscious chocolate center. These bite-sized cookies are great for holidays, gatherings, or simply indulging your sweet tooth. With their classic appearance and rich flavor, they’re bound to become a family favorite.
Why You’ll Love This Recipe
- Simple and quick to prepare, ideal for bakers of all skill levels.
- A versatile recipe allowing for various filling options.
- Perfect for gifting, entertaining, or satisfying a chocolate craving.
- Rich, buttery cookies with a decadent chocolate filling create a satisfying dessert.
- Customizable with toppings like nuts, sprinkles, or a drizzle of caramel.
Ingredients
(Tip: You’ll find the full list of ingredients and measurements in the recipe card below.)
- Unsalted butter
- Granulated sugar
- Egg yolk
- Vanilla extract
- All-purpose flour
- Cocoa powder
- Salt
- Chocolate chips or chocolate of choice (for the filling)
- Optional toppings: crushed nuts, sprinkles, or sea salt
Directions

- Preheat the oven: Set the oven to 350°F (175°C). Line a baking sheet with parchment paper.
- Make the dough: Cream the butter and sugar in a large mixing bowl until light and fluffy. Add the egg yolk and vanilla extract, mixing until combined.
- Mix dry ingredients: In a separate bowl, whisk together the flour, cocoa powder, and salt. Gradually add the dry mixture to the wet ingredients, mixing until a dough forms.
- Shape cookies: Roll small portions of dough into balls and place them on the prepared baking sheet. Use your thumb or the back of a teaspoon to create a small indentation in the center of each cookie.
- Bake: Place the cookies in the oven and bake for 10-12 minutes, or until the edges are set.
- Prepare the filling: While the cookies are baking, melt the chocolate chips in a microwave-safe bowl in 20-second intervals, stirring in between, until smooth.
- Fill the cookies: Once the cookies are out of the oven and slightly cooled, spoon the melted chocolate into the indentations. Add optional toppings if desired.
- Cool and serve: Let the cookies cool completely to set the chocolate before serving.
Servings and Timing
- Servings: Makes approximately 24 cookies
- Prep Time: 15 minutes
- Cook Time: 10-12 minutes
- Total Time: 30 minutes
Variations
- Flavor Twist: Add almond or peppermint extract instead of vanilla for a unique flavor.
- Nutty Topping: Sprinkle chopped nuts like hazelnuts, pecans, or almonds on top of the chocolate filling.
- Fruity Touch: Use jam or fruit preserves in place of the chocolate for a fruity variation.
- Gluten-Free Option: Substitute all-purpose flour with a gluten-free baking mix.
- Dairy-Free Version: Use plant-based butter and dairy-free chocolate chips.
Storage/Reheating
- Storage: Store the cookies in an airtight container at room temperature for up to 5 days.
- Refrigeration: For extended freshness, refrigerate them in an airtight container for up to 10 days.
- Freezing: Freeze the cookies in a single layer before transferring them to a freezer-safe container for up to 3 months.
- Reheating: Allow frozen cookies to thaw at room temperature before serving.
FAQs
1. Can I use dark chocolate for the filling?
Yes, dark chocolate works wonderfully for a richer and slightly less sweet flavor.
2. Can I make these cookies ahead of time?
Absolutely. Prepare the dough ahead and refrigerate it for up to 2 days before baking.
3. How do I prevent the cookies from spreading too much?
Chilling the dough for 20-30 minutes before shaping the cookies helps prevent spreading.
4. Can I use salted butter instead of unsalted?
Yes, but reduce the added salt in the recipe to balance the flavors.
5. What if I don’t have cocoa powder?
You can skip the cocoa powder and make a plain thumbprint cookie with the same recipe.
6. How do I make the filling smoother?
Add a teaspoon of heavy cream or coconut oil while melting the chocolate for a glossy finish.
7. Can I use white chocolate?
Yes, white chocolate makes a deliciously sweet filling for these cookies.
8. What’s the best way to create the thumbprint?
Using the rounded back of a small teaspoon or your thumb works perfectly. Dip it in flour to prevent sticking.
9. Can I freeze the dough instead of baked cookies?
Yes, roll the dough into balls and freeze them. Bake directly from frozen, adding 1-2 minutes to the baking time.
10. How do I add a caramel filling?
Fill the indentation with a pre-made caramel sauce after baking and allow it to set.
Conclusion
Chocolate Thumbprint Cookies are a timeless treat that are as fun to make as they are to eat. With a rich, chocolatey center and tender cookie base, they’re perfect for any occasion. Try this easy recipe today and bring a touch of sweetness to your day!
Print
Chocolate Thumbprint Cookies
- Prep Time: 20 minutes
- Cook Time: 12 minutes
- Total Time: 1 hour 2 minutes
- Yield: 24 cookies 1x
- Category: Dessert
- Method: Baking
- Cuisine: American
- Diet: Vegetarian
Description
These delightful chocolate thumbprint cookies are a perfect blend of a buttery, soft cookie base and a rich chocolate filling. They’re an easy-to-make treat, ideal for holidays or any time you’re craving something sweet. The slight crisp on the outside and the creamy chocolate center make these cookies a crowd favorite.
Ingredients
- Cookie Dough:
- 1 cup (2 sticks) unsalted butter, softened
- 2/3 cup granulated sugar
- 2 large egg yolks
- 1 teaspoon vanilla extract
- 1/4 teaspoon salt
- 2 cups all-purpose flour
- 1/3 cup cocoa powder (unsweetened)
- Chocolate Filling:
- 1/2 cup heavy cream
- 4 ounces semi-sweet chocolate, finely chopped
- 1 tablespoon unsalted butter
- Optional: Powdered sugar for dusting
Instructions
- Make the Cookie Dough:
- In a large mixing bowl, cream together butter and sugar until light and fluffy.
- Beat in the egg yolks, vanilla extract, and salt until combined.
- Sift together the flour and cocoa powder, then gradually mix into the butter mixture until a soft dough forms.
- Cover and refrigerate the dough for 30 minutes to firm up.
- Shape and Bake:
- Preheat your oven to 350°F (175°C). Line baking sheets with parchment paper.
- Roll the dough into 1-inch balls and place them about 2 inches apart on the prepared baking sheets.
- Use your thumb or the back of a teaspoon to make an indentation in the center of each ball.
- Bake in the preheated oven for 10-12 minutes, or until the edges are set. If the indentations puff up during baking, press them down gently with a spoon while the cookies are still warm.
- Let the cookies cool completely on a wire rack.
- Prepare the Chocolate Filling:
- Heat the heavy cream in a small saucepan over medium heat until it begins to simmer (do not boil).
- Remove from heat and pour over the chopped chocolate in a bowl. Let it sit for 2 minutes, then stir until smooth. Stir in the butter until fully incorporated.
- Assemble the Cookies:
- Spoon or pipe the chocolate filling into the center of each cooled cookie.
- Let the cookies set for about 30 minutes, or until the chocolate filling firms up.
- Optional Garnish:
- Dust cookies with powdered sugar or drizzle with white chocolate for an elegant finish.
Notes
- These cookies can be stored in an airtight container at room temperature for up to 5 days.
- For a twist, try using white chocolate or dark chocolate for the filling.
- Add a pinch of sea salt to the chocolate filling for a sweet-and-salty combination.
Your email address will not be published. Required fields are marked *